
Supports Menu User Guide
The Supports menu option allows you to add, edit and delete participant's Supports.
After clicking on Supports from the main menu, you can choose to view all supports, only transport supports, the allocations page, non-Transport supports and deleted supports.
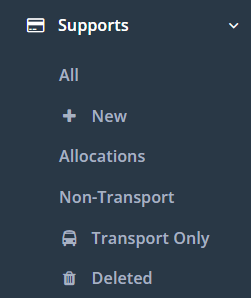
Supports → All
When viewing a list of supports, there are several ways to filter, sort and export your shown supports.

Use the blue button to filter by dates, and the other filters to narrow your selection down further.
- Any Check Status: filter by if a support has been Checked or not
- Any Paid Status: show paid or unpaid supports.
- Any Export Status: filter by if support has been NDIS exported or not
- Any Location: filter by location of the support. Locations can be added via Client Central, or through Caremaster support.
- Status: Non-cancelled supports are filtered out by default, change this to show all supports or a specific type.
- Other Flags: Filter on Grouped and/or Recurring
- Any Participant Categories: Allows you to filter the list by only clients with the specified category
- Participant: to view a specific participant’s supports type their name in the participant field.
- Support Worker: search for supports assigned to a specific worker, or any that are unassigned.
- Any Coordination: This lets you pick whether to filter the support list by the coordinator assigned to the client OR the coordinator assigned to the support.
- Any Service Organisation: filter supports that are for a specific Service Organisation.
- Service: filter supports that are for a specific Service. Only displays once you have picked a service organisation.
- Invoice/claim reference number: filter by the receipt or reference number.

Clear all applied filters

Search using the existing filters

Export a list of your filtered supports to either PDF or Excel format. You can select what information is included in this export from
Data > Transaction List Export.
Click on the link for further information Transaction List Export

Automatic Timesheet Generator. Clicking this button will generate a timesheet for the filtered supports where;
- There isn't already a timesheet
- The Support is Checked
- The Support has a worker assigned
Use this with care and only as needed. This should only be used historically in place of automatically creating timesheets for your workers where a timesheet couldn't be created from the app just before doing payroll.
After using the filters described above, you can then order your support list by clicking on the header of the column you wish to sort by.
You can change what columns are here (and their order) in Data > Support Data -> Support Display. For more information, go here:

You can use the New button to create new support records.
The Manage button is a wizard that allows you to make bulk changes to Supports. Its vastly preferred that the Recurring functionality is used instead where able.
A total of the supports you have filtered for.
Supports -> Allocations
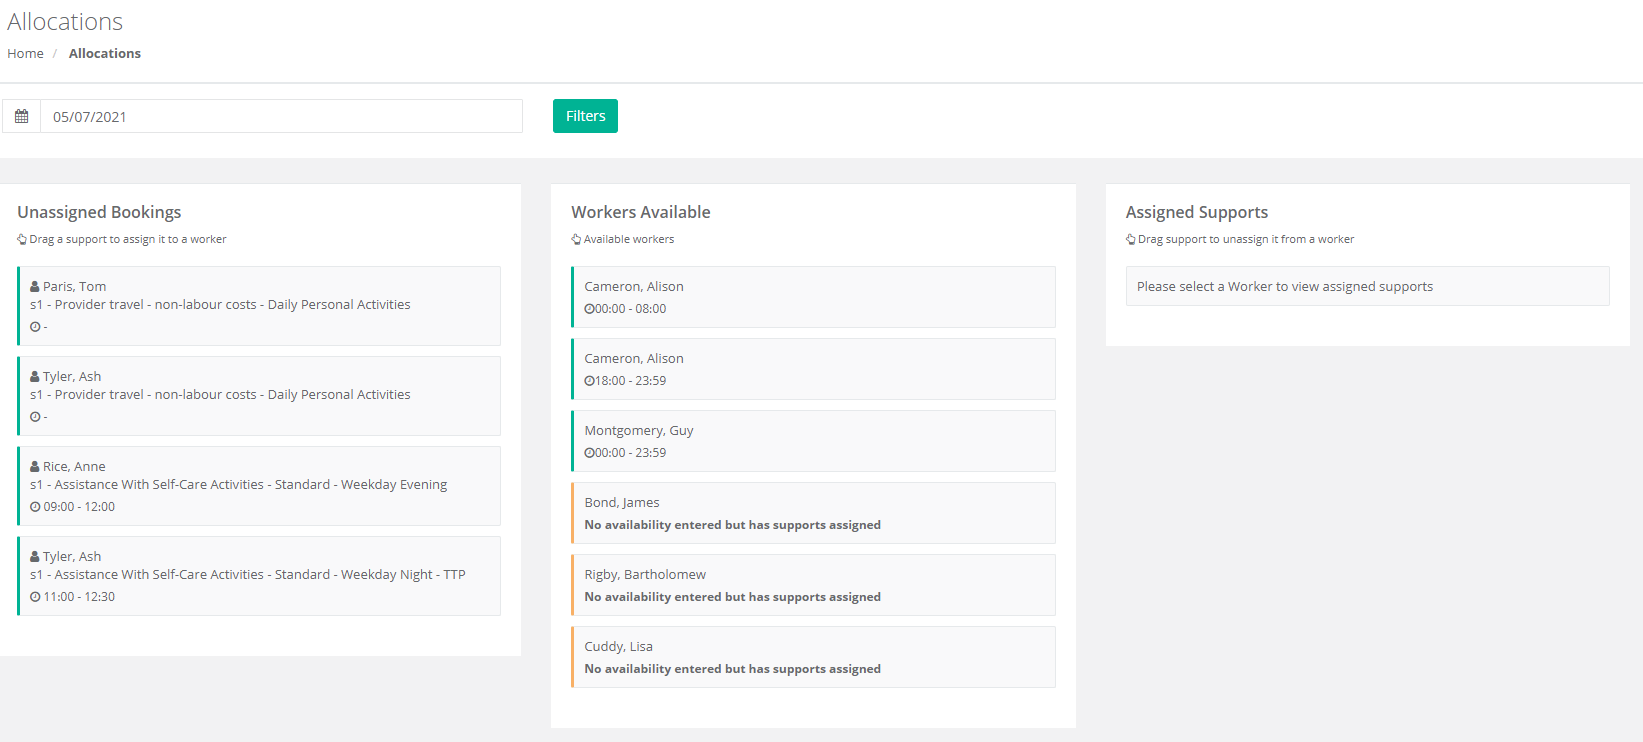
The Allocations submenus shows the Unassigned Bookings, Workers Available and the Assigned Supports.
The supports under Unassigned Bookings can be dragged to an Available Worker or to Assigned Supports.
Supports -> Non-Transport
This page lists all of the supports that do not have transport ticked in their form.
Supports -> Transport Only
This page lists all the supports that are marked as transport.
Supports -> Deleted
This page lists all deleted supports in the system with how it was deleted, when it was deleted and who deleted it.
You can click on the Restore icon under the Restore heading to get it to show in the main supports section again.