
User Guide to Printing Incidents
Printing incidents is an important aspect of managing and documenting your incidents. With the right tools and techniques, you can quickly and easily generate and print incident reports in a format that suits your needs. In this guide, we will provide step-by-step instructions for printing incidents, as well as tips for dealing with incidents that contain large sections of text.
Step-by-Step Guide:
Filter your incident list: To print one or more incidents, first filter the incident list using the filters at the top of the page. You can filter by various criteria such as date, status, severity, or category to narrow down the incidents you want to print.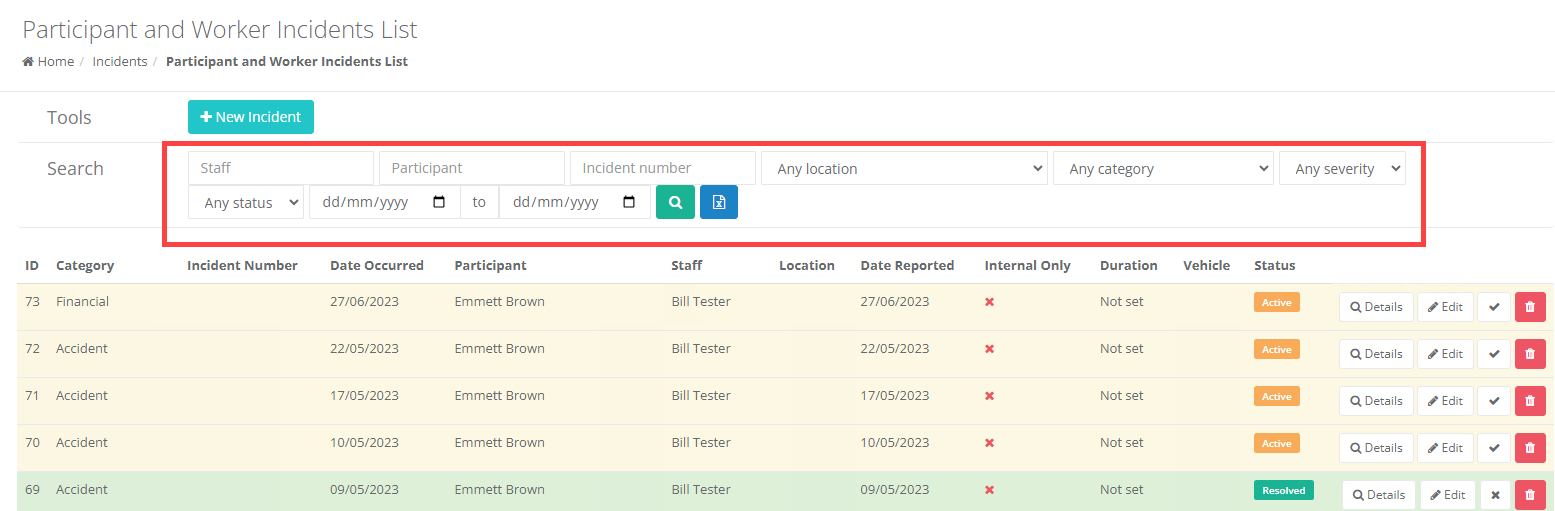
- Click the Print button: Once you have filtered the list, look for the blue Print button on the right-hand side of the page. Click this button to generate a formatted Excel document of the filtered incidents.

- Download your printed incidents: After clicking the Print button, your filtered incidents will automatically download to your computer as an Excel document. You can then open the document to view, print or save it for future reference.
Tips for Dealing with Large Text Sections:
Sometimes, incidents may contain large sections of text that do not format well in Excel. In such cases, follow these steps:
- Click on Details: To view the full incident, click on the Details button next to the incident you want to print. This will open a new page with the full incident details.
Click the Print button: Once the incident details are visible, click on the three vertical dots on the top right-hand corner of your browser, and select Print.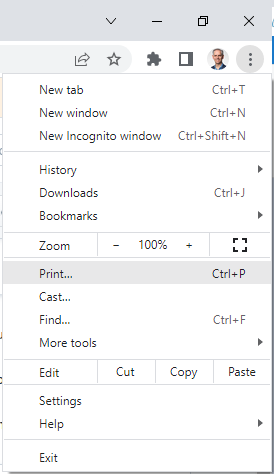
- Save as PDF: From the printing options, select Save as PDF, then choose a filename and click Print. This will create a PDF version of the incident report that you can edit, if necessary, in a word processor like Microsoft Word.
- Edit in Microsoft Word: Open the PDF incident report within Microsoft Word to add or remove additional text or formatting as necessary. This will give you more control over the layout and appearance of the incident report.
Conclusion:
Printing incidents is an important part of managing and documenting incidents. By following the steps outlined in this guide, you can quickly generate and print incident reports in a format that suits your needs. Remember to filter the incident list, use the Print button to generate a formatted Excel document, and follow the steps for dealing with large text sections. With these tips, you can easily create professional-looking incident reports that help you track and manage incidents more effectively.
\