
New Journeys
This window will display your journey information. It will allow you to create or modify journeys and trips.
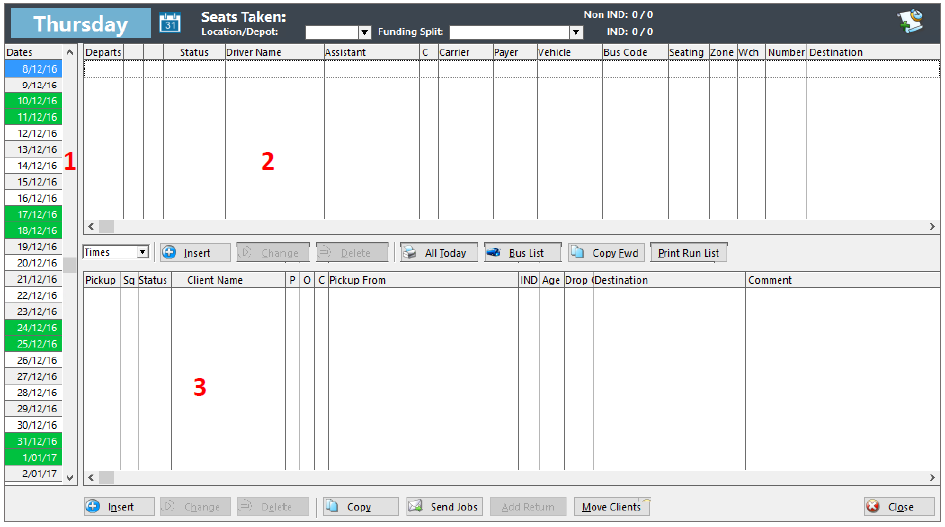
1. Date Section
2. Journeys Section
3. Trips section
Journey Section
Left Clicking on these column names will sort them in Ascending or Descending order.
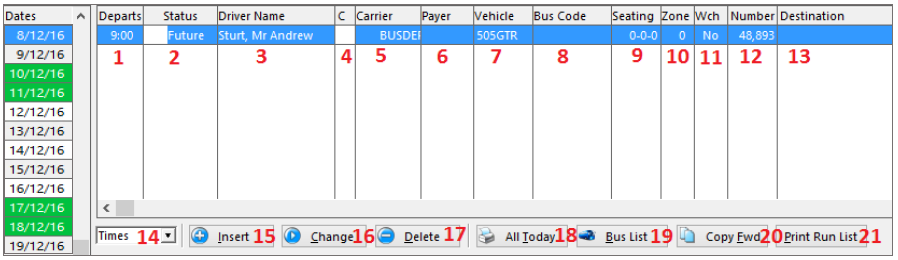
- Departure Time
- Status
- Driver name
- Confirmed
- Carrier
- Payer
- Vehicle Rego
- Bus Code
- Number of Seats
- Zone
- Wheelchair capable
- Journey number
- Destination
- Order Journeys by Times, Sequence or Names
- Insert Journey
- Change Journey
- Delete Journey
- Print All Today
- Import Bus List
- Copy Forward
- Print Run List
Trip Section
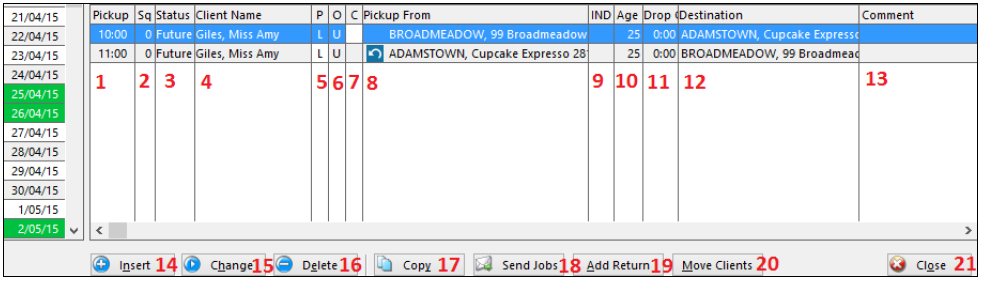
- Pickup time
- Sequence number
- Status
- Client Name
- Priority
- Support Level
- Confirmed
- Pickup address
- Indigenous client
- Age of client
- Drop off time
- Destination address
- Client comment
- Insert Trip
- Change Trip
- Delete Trip
- Copy Trip
- Send Jobs
- Add Return Trip
- Move Clients
- Close New Journeys Screen
Move Clients
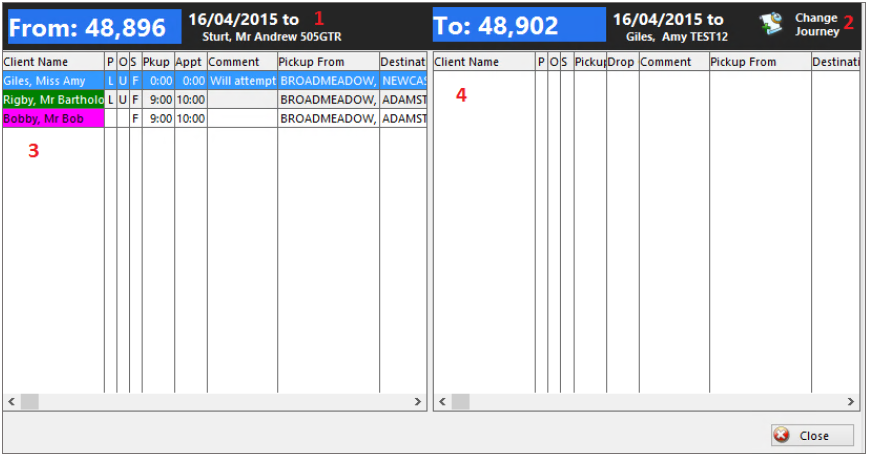
- Selected Journey Summary
- Select journey you are moving the clients to
- Clients in selected journey
- Clients in journey you want to move them to
Left click and drag the trip/s on the left-hand side to the right-hand side. You can also drag clients from the right to the left-hand side.
Journey Form
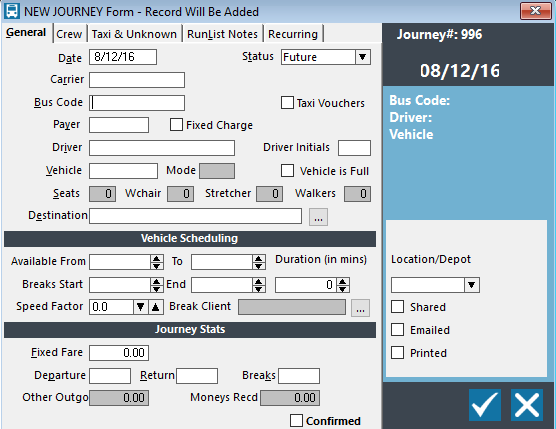
Date: Date of Journey Carrier: This is the Carrier Code lookup. Bus Code: This is the Bus Code lookup. Taxi Vouchers: If taxi vouchers are needed or used check this box. Payer: This is the Payer Code. Fixed Charge: Tick this box if the charge for this Journey is fixed in advance or an agreed upon amount rather than a kilometre charge. Driver: Enter the driver name for this Journey. You can partially type in their last name and press TAB or ENTER to bring up a list of drivers. Vehicle: Vehicle Registration. You can partially type the rego and press either TAB or ENTER to bring up a list of vehicles. Vehicle is Full: Tick this check box if the vehicle is full. The Vehicle will be highlighted in Yellow if it is full. Mode, Seats, Wchair & Stretcher: These are informational only based on the vehicle selected and cannot be changed on this screen. Destination: Destination of the Journey. You can partially enter the destination and press either TAB or ENTER to display a list or you can left click on the … browse button. Fixed Fare: If the Journey has a fixed fare enter it here, if not leave it. Departure: This is the time of the departure for the Journey. Enter in the format HHMM. Return: This is the time of the return of the Journey. Enter in the format HHMM. Breaks: This is an allowance for breaks in a time format. Eg 0100 for a lunch break etc. Other Outgo & Monies Recd: These fields are greyed out and cannot be changed. Confirmed: Tick this checkbox if the Journey is confirmed with the driver.
Crew Tab
Allows you to add additional crew to a Journey.
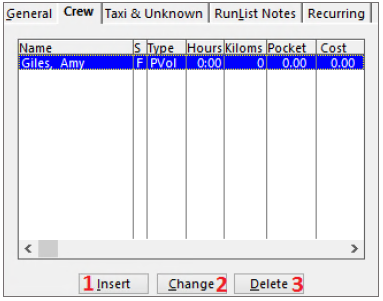
- Insert an additional crew member into the journey:
- Change the highlighted crew member’s journey information
- Delete the highlighted crew member from the journey
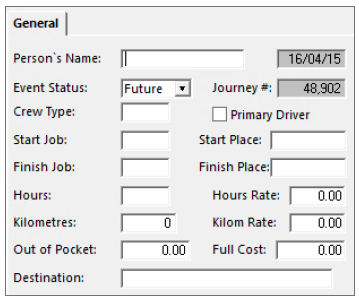
Fill in the Adding a Crew Event Record form to account for additional crew on the journey and click OK.
Taxi & Unknown Tab
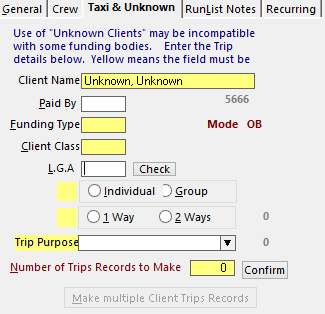
Allows you to create multiple unknown client Trips easily. Yellow fields must be filled out.
If you wanted to create five unknown client Trips, you would fill in the yellow fields as required, enter the number of trips to make in the “Number of Trips to Make” field, Left Click on Confirm and Left Click Make Multiple Client Trips Records. This will then create multiple Trips in the selected Journey.
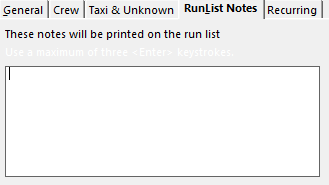
Run List Notes Tab
These notes will be printed at the top of the Run List for this Journey.
Recurring Tab
Allows you to set up recurring journeys, i.e. if you have the same group outing once a week. This is a control setting and must be activated.
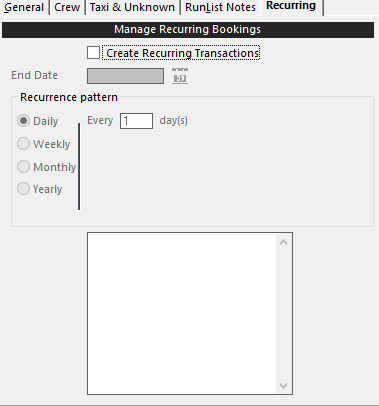
To create a recurring journey:
- Tick Create Recurring Transactions
- Select an End Date for the Recurring Transactions
- Select a Recurrence Pattern with Daily (Every X Days), Weekly (Every X weeks, on specific day(s) of the week) or Monthly (Day X of every X Months or the first specific day(s) of every X Months.
- The summary window will display all of the proposed recurring journeys and display a total. Check this summary and then click on the Tick to create the recurring journeys.