
User Guide: Case Notes
Case Notes Setup Guide
Case Notes can be added to a Participant profile to record information or an interaction between the Participant and Staff
- Log Case Notes against a Support while in the field by Workers
- Create a billable or non-billable item for Support Coordination or Management conversations.
- Create a paper trail of all customer interactions which is easy to view, search and download.
Step 1: Case Note Categories
You can create many different Categories of Case Notes to apply to your Participants.
To view the existing or make new Categories, on the left hand Menu bar, select Data à Participant Data à Case Note Categories
You can now see a list of existing Case notes by their columns of:
- Name
- Case Notes – How many have been created
- Activities – How many are associated with each Case Note
- Support Created
- Not required

- Allow Support Linking

- Support Linking Required

- Goal Evidence
You can  a Category at any time but can only
  a Category if there are no Case Notes created.
Please note: The App Note category is a locked and cannot be deleted. This is the default Case Note for the Worker App.
To create a New Category, click 
Add a Category Name
For Support Creation and Linking, Identify if you want the Case Note to create a Support that can be invoiced.
No – Do not allow support linking
Maybe – Allow support linking
Yes – Support linking required
Activities
These can be added to report on specific actions that are used to describe or prompt a specific action – More in Step 2
User Category Restrictions
There may be some Case Note categories that you want to have visible in the Worker App but not for everyone. By adding a category restriction to a case note, it will allow only workers with that category, in their profile under Vitals, to have access to create this specific case note type.
To add a Category to a worker, go to their Staff Profile and Edit the Vitals section in the top of the left side of the page. You can then add a category in the Categories section. 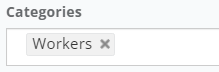
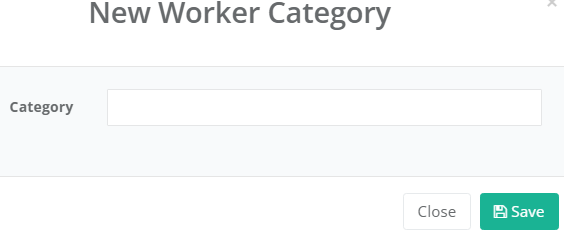
To Create a Worker Category
Go to Data > Support Worker Data à Support Worker Categories > 
Allow case notes of this category to be created or updated by workers with access
This setting will allow the category of a case note to be changed if it needs to be edited. Some case notes generate a billable support and when you edit them, it would not let you save without creating another support. Now with this setting you can select if this case note can be edited without impacting the existing support or creating a new one.
Require Goal Tracking Evidence
Tick this if this Case Note is used to track and progress a Participant Goal.
Based on the selection it will tally to a Participant Goal and allow you to upload Evidence as notes, pictures or documents.
Set as Default app note category
Tick this to make it the default case note for the worker App. It will be automatically selected when a worker creates a Case Note. Another category can then be selected by the worker if required.
By selecting a Case Note as the app default, it will also;
Show Category in Worker App
This will allow the workers to access the category and view prior notes in the Worker App.
i.e. if you have a worker on a billable support, you may not want a category to be available to select in the Worker App, Or the Case Note Category may be of a sensitive nature and not desired to be accessible in the Worker App
Template
Any information added here will also be visible when adding a New Case Note for a Participant.
It will prepopulate any questions, statements or actions when this Case Note is selected.
Step 2: Case Note Activities
Think of activities as the action involved, i.e., you're delivery Support Coordination via a phone call. The Activity is the Phone Call. Or, you're leaving a note regarding the Participant rescheduling their service via SMS. The Activity is the SMS.
To view the existing or make new Activities, on the left hand Menu bar, select Data à Participant Data à Case Note Activities
To make a New Activity, click  and this will let you create an Activity with any name required, then Save. This is now available to be added to a Case Note as a selectable Activity.
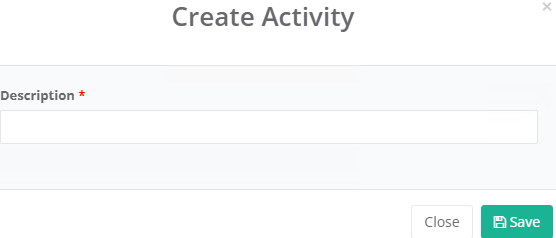
You can  an Activity at any time but can only
  an Activity only in there are no Case Notes created with it.
Step 3: Adding a Case Note to a Participant Profile
Go to your relevant Participant Profile and Press + on the Case Notes section

Select your Case Note Category
If the category has been set up to Allow Support Linking choose between:
- Do not create Support
- Do not create support, require tracked goal
- Support allowed
- Support Allowed, require tracked goal
- Support Required
Select the relevant Activity i.e. Phone Call, Email…
*If you are selecting a category with that requires tracked goal, also pick a goal to associate this case note with.
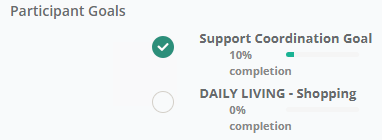
**If you have selected a category with Support allowed, do not select a Service Organisation or Service unless you want to create an invoice for this case note.
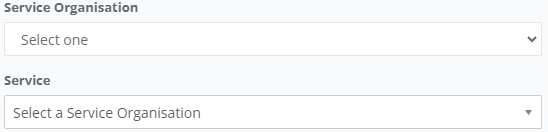
***If you have selected a category with Support required, select a Service Organisation and Service to create an invoice for this case note.
Select a Date for this Case note. You can choose a past or future date as needed. The record will still display the created date.
Choose a start and end time or Add in Time Taken. If invoicing for this case note, it will multiply the time taken by the unit cost of the selected service to create a billable total. The generated support will show the start and end time based on the duration and the end time is set when you press the save button.
Mark as favourite if you wish to set this as the default case note for this participant.
Add Notes as needed and upload any required files, pictures or documents, and  .
.
Step 4: Adding a Case Note via the Worker App
Workers can create a case note within an active support, by scrolling down on the page and pressing Add Note. This process links the workers case note to their rostered support.
Select your Note Category – Only categories that have been set up as ‘Show category in worker app’ will be visible. Update this at Data à Participant Data à Case Note Categories
Type your Notes and upload additional audio, pictures or documents as needed.

You can select to flag it as High Priority – This will create a notification to your Coordinator or Administrator if setup for this.
Link to Goal if required and then select the goal to associate this case note to.
 This will allow you to save your note and comeback to complete it later.
 Press to submit your note and it will loaded to the Participant profile.
Alternatively
Workers can select the Participants button to choose who to add a case note to.

Then select the Notes tab and Add Note.

This process does not link the case note to the rostered support.
***Uploading Case notes if the app is offline
If the worker app is offline when the case note is being added, it will display a message:
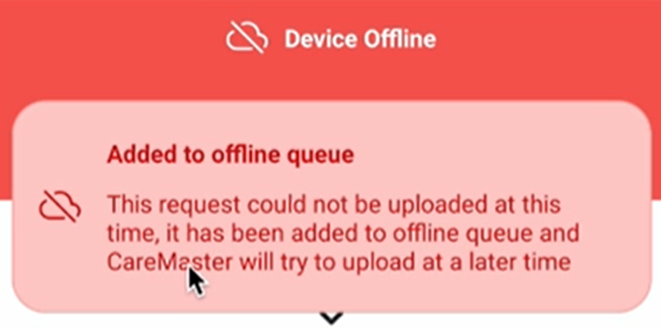
During this time, the Case Note will be saved as a Draft you can go back and edit the draft Case Note
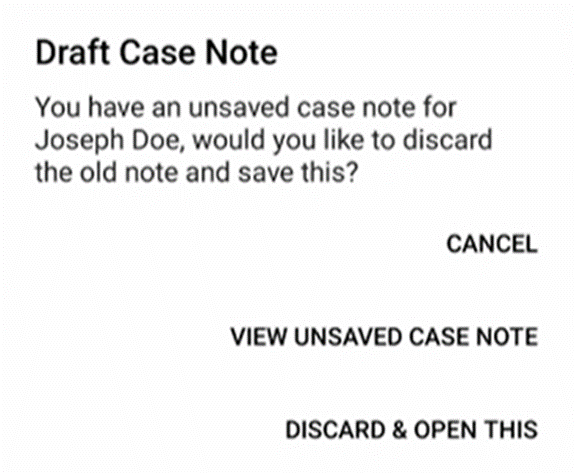
The Worker App will then upload these when the device is online or when you next login within signal range, you can select Sync Now.

Step 5: Adding a Case Note via the web Portal Support page
1.
Users can add a case note directly against existing supports via the web portal.
This function will only be available if there is not an existing case note attached to this support.
2.
Find your required Support. This could be via the:
- Supports → All page
- Roster → Worker page
- Roster → Participants page
- The Worker profile → Search existing supports
- The Participant profile → Search existing Supports
3.
Open / edit the support and go to the App Data tab and Add Case Note.
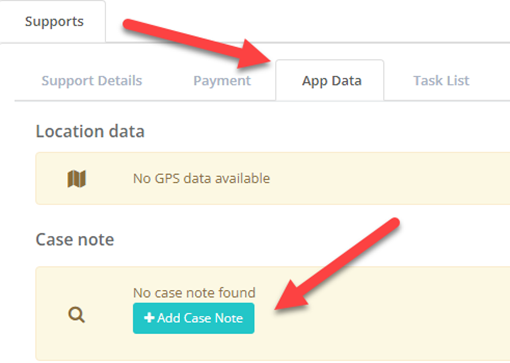
It will display the existing support time and date.
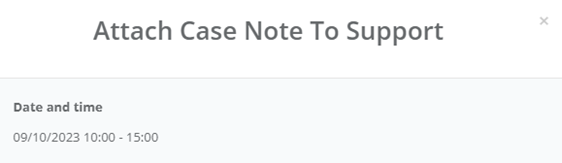
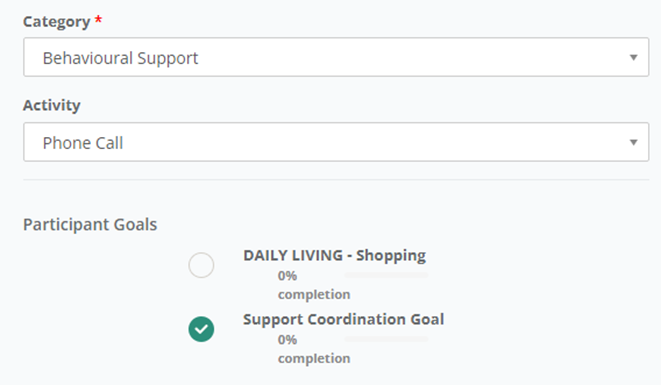
Select a Category and Activity. For Categories to be available to select, it must be configured as either Allow support linking or Support link required.
A system administrator can update a Case Note configuration by going to Data → Participant Data → Case note categories and editing the required categories. – See below
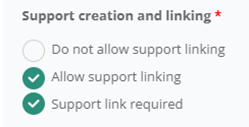
If you have selected a category that requires goal tracking, you will also need to choose the goal to assign the evidence to.
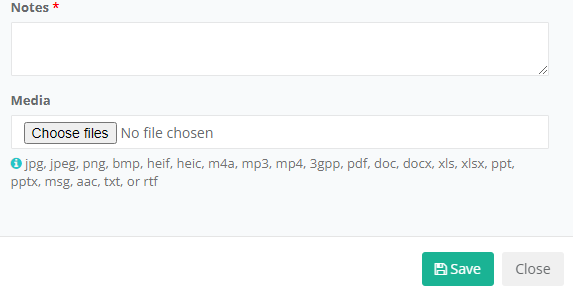
Now add your notes and upload any supporting files and Save.
It will then appear as linked to the Support and visible as normal in the Participant profile.
Step 6: Viewing and Editing a Case Note
To View an existing Case Note, start on the Participant Profile

To search for a specific type of Case Note, select the Binoculars.
This will open the Search section, where you can filter by Category, Activities and Date.
Once found, you can click the Edit button to open it.
Please note: You can also click the Link button, to view the associated Support if needed.
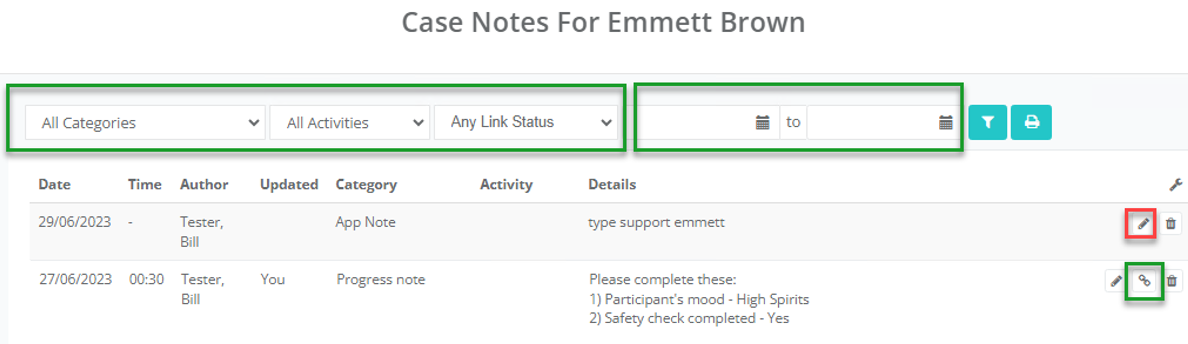
Changing the Category Type on a Case Note with a linked Support
Sometimes you will need to reclassify a Case Note to a different Category to make sure the records are accurate. If this was previously attached to a support and the new category is not attached to a support, a warning message will appear confirming you want to proceed.
To start, search for the Case Note on the Participant Profile and edit.
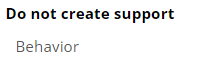
In this example, we are changing it from Case Note Category – Billable Hours (this is classified as Support Allowed) to Case Note Category – Behaviour (this is classified as Do not Create a support)
 →
→ 
It will inform you that the case note is currently linked to a support.
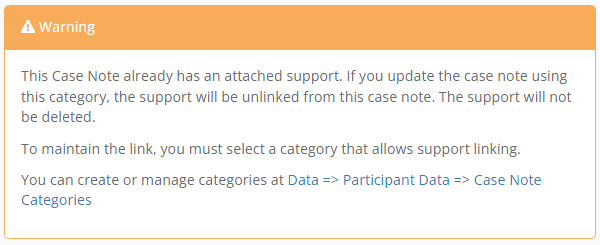
If you proceed, the case note will be unlinked from the support, but the support itself will still exist. The message will ask if you are sure you want to continue.
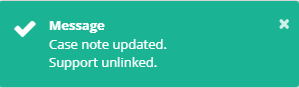
Step 7: Restrict users from viewing and creating case notes based on category
This feature will introduce privacy controls on case notes based on the case note category and link it to the worker categories of those workers who have permission to view and create case notes based on those categories.
You will first need to make sure you have the right Worker Categories setup.
Go to Data→ Support Worker Data → Support Worker Categories
Create a New Category if needed.
*You can also see who is assigned to each category by clicking on the 
Now go to Data → Participant Data → Case Note Categories and edit any existing Case Note or add the category restriction into a New Case Note.
By adding a Category in the below section, it will only allow workers with that category applied to their worker profile to view those specific case notes.
If no categories are selected, workers of any or no category will be able to view case notes of that category.

Step 8: Reporting on a Case Note
The Participant case notes are available to be downloaded in a report.
Go to Reporting à Participants à In the dropdown, select Export Case Notes
Choose a Start and End date
Choose 1 Participant or add more as needed. Leaving the Participant field blank will report on All participants
Select a Case Note Category
Select a Support Worker or add more as needed. Leaving the Support Worker field blank will report on All workers
Data Layout - Select Vertical or Horizontal
Export Formats available are Excel or PDF

Step 9: Settings
System Settings
Go to Settings à System Settings and search for key words to change these settings as needed.
Setting Category
Setting Name
Setting Information
Client case notes
Show activities
Turn on/off whether to add activities field to Case Notes.
Client case notes
Show timesheet event options in case note categories
If desired, you can add the Timesheet Events (Data > Timesheet Events) to select from alongside your other case note categories when creating a case note for clients.
Staff Timesheet
Send Comment to Cases Notes
For client services, any notes in the timesheets get added as case notes for that client.
System
Add Worker/Coordinator to case note created transaction
The worker/coordinator who created the case note will be automatically assigned to the linked support
System
Adding a case note will automatically add a corresponding transaction
This should generally be set to Yes unless you definitely won't be wanting any automatically created supports. Transactions still won't be automatically created without the appropriate Case Note category configuration.
System
Number of weeks before case notes will become locked to editing
Choose how long before case notes can no longer be edited after creating. If set to 0, notes are locked from being edited immediately after being created.
Worker App Settings
Go to Settings à Worker App Settings and search for key words to change these settings as needed.
Setting Name
Setting Information
Case Note Notification
Decides who will receive a notification when a case note is submitted via the app.
Hide Add Note Button On Client Record
Disables the add note button on the client profile in the app so only notes can be added via the support.
High Priority Case Note Notification
Decides who will receive a notification when a high priority case note is submitted via the app
Show Case Note Category On Create
Will display a case note category for workers to choose from when creating a note
Show Case Note Category On View
Will display the case note category when viewing previous notes, allows filtering by category
Require Case Note on Support End
If turned on, a worker is required to enter in a case note for each support before they can end the support.
Show Client Notes
Toggle on/off the participant's notes section to workers on a participant/client profile via the worker app.
Goal Evidence Notification
Decides who will receive a notification when the selected activity is performed via the app