User Guide: Documents
Summary
CareMaster gives you the ability to Upload Documents to share with your Participants and Workers
You can create specific Categories for Generic Documents, Participants and Workers specific to their needs. You are able to view them in a List or Folder view and set expiry dates that will create Alerts for follow up for document management. You can also Archive and Update documents for version control.
Step 1: The Documents Tab

You can filter and search the documents shown by Category, Title, File name, If visible to workers and Expiry Date by using the filters at the top of the page.
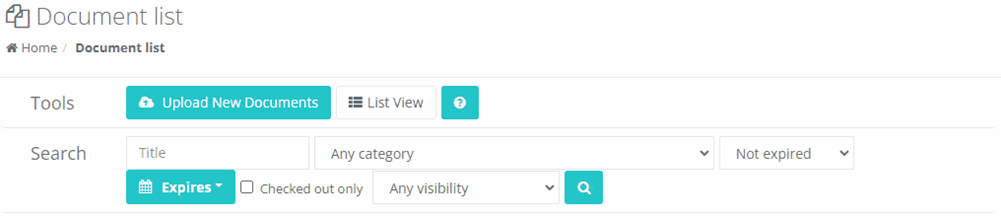
You can also sort by Expiry date, Uploaded, Created, Category, Folder and Title by clicking on the Column Header.
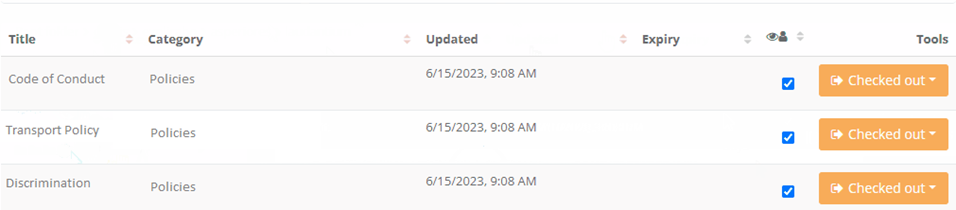
There are 2 views available in Documents;
The List View -
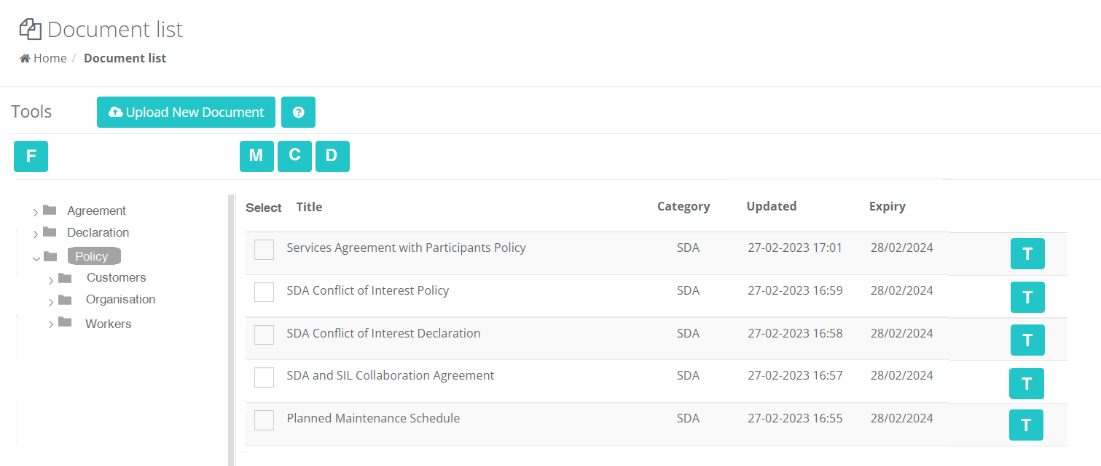
And the Folder View -
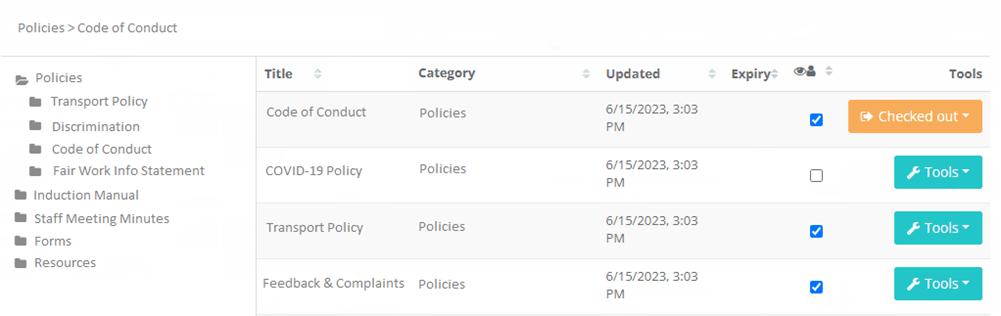
When the user clicks a folder, the list of files that are linked to the folder is displayed on the right.
Folder Management
If you want to create a Folder within a Folder, there are no limits to adding subfolders.
When you are in the Folder View, select
 and the below box appears.
Name your folder and select Root Folder for the top tier, or choose the appropriate folder where you want to store the documents in.
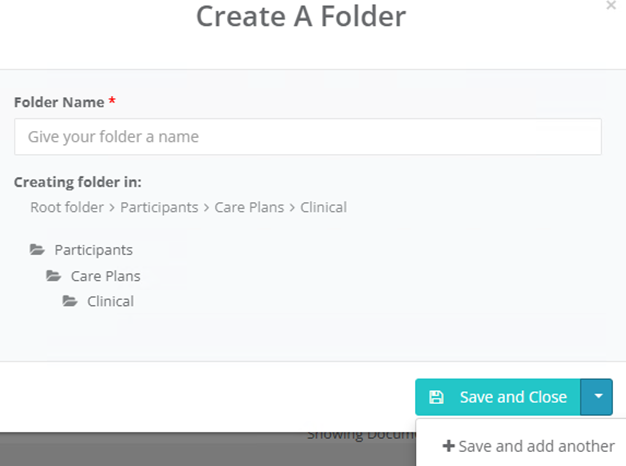
In this example, the document will be added in the sub folder Clinical, under Participants > Care Plans
You can Save and Close or Save and add another.
You can also move existing Documents across different folders if needed;
Hover on the folder you want to edit and an icon appears
When this button is clicked a new window will pop up allowing the user to perform the following actions:
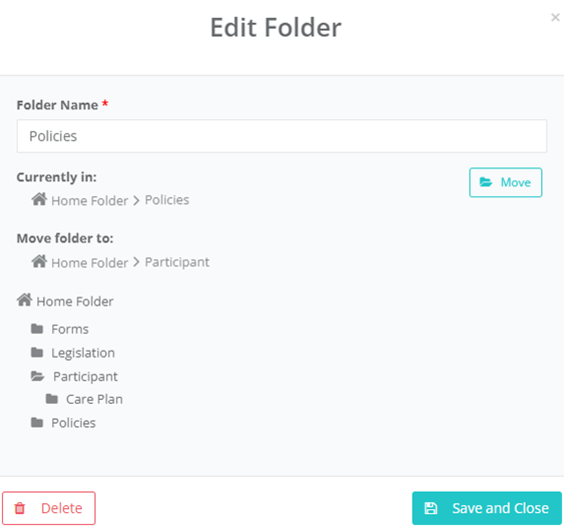
Create a folder.
You must select folder to create a sub-level folder and provide a name.
Delete a folder.
You are unable to delete a folder if it contains documents. These will need to be moved first. If the deleted folder has any sub folders, these will also be deleted.
Move a folder.
Moving a folder automatically moves all its child sub-folders and documents within it.
Rename a folder.
Edit and update the name as needed.
Bulk Folder Actions
*Please note this action is only available for Admin users
In both List view and Folder view, the option is available to perform the same action for multiple Documents.
When you select one or more via the check box
 an additional menu items appear as shown below.
Move all selected documents to a different Folder
Change the Category of all selected documents
Delete the selected documents
Sending Documents to Workers / Participants
It is now easy to create a News Item directly from the Documents section.
Simply select the check box of the document(s) you want to send to your workers
 and press
This will open a window where you can send a document directly to a Worker or Participants App and it will appear in their News section on their App.
Select if you want to send to Workers or Participants.

Add a Title and a summary or message of the news item in Content.
You can filter your target audience by adding specific Categories and or Locations. You can add multiples of each to reach a larger audience.
*Not adding any Categories or Locations will send to All.
Add an Expiry date and Save to send.
Creating new Document Categories
If you need to create additional Document Categories, go to Data > Miscellaneous > Generic Document Categories.

Add your Description for the new Category and select if this is Visible to workers by default.
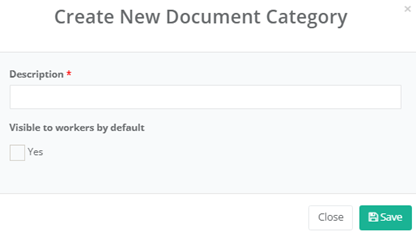
This can be updated at anytime by pressing the edit button
To Delete an existing Category, select Delete on the right-hand column.
**Please note if you have any documents loaded against this category, these will need to be removed before it can be deleted.
Step 2: Uploading a New Document
When a document is uploaded an automatic email will be sent out to all Staff with a link for the download and a link to confirm that they have read the document. (This will only occur if the email settings have been set up).
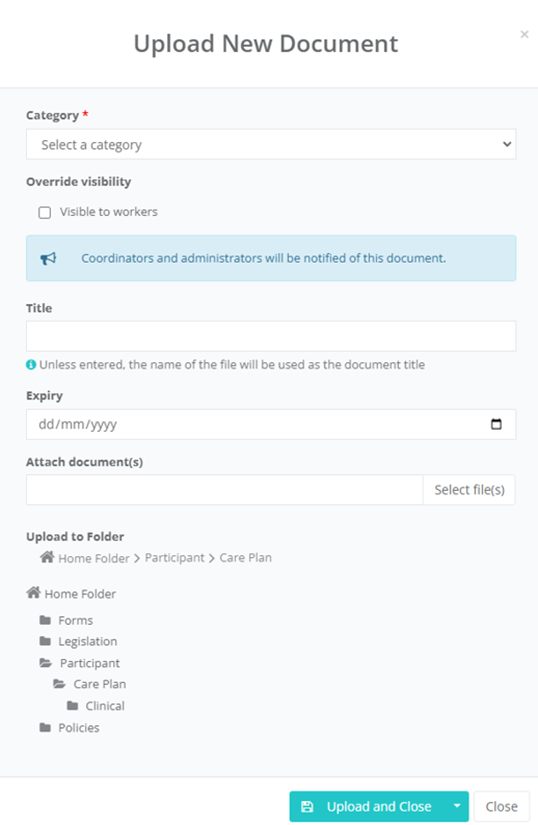
Upload New Document
Add a folder dropdown to the upload documents page. The dropdown will contain a list of folders and subfolders that exist. Folders and subfolders will be listed in alphabetical order.
You will need to:
Choose a Category
Select if Visible to Workers
Add a Title and set an Expiry date
Attach the relevant Document.
When uploading new documents, choose the folder to assign them to.
Document Upload Notification
When the setting Document Upload Notification is turned on, staff will be sent a notification after a new document has been uploaded.
This contains a link to the document, and a link to click on to confirm that they have received the notification. To change this setting, search for the setting 'Document Upload Notification' in Main Settings.
Staff with a worker access user level will not receive a notification if the document is not set to be visible to workers, or if the setting Hide documents section of workers is turned on.
Documents will always be sent to the staff member's email address regardless of the Alert type.
Tools Menu
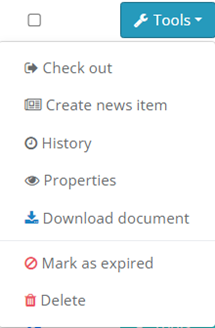
By pressing Tools, it will allow you to Check out and Edit the Document, Mark it as Expired, Download, view Properties, Update and edit and Delete the document.
If there is no document uploaded, it will advise:
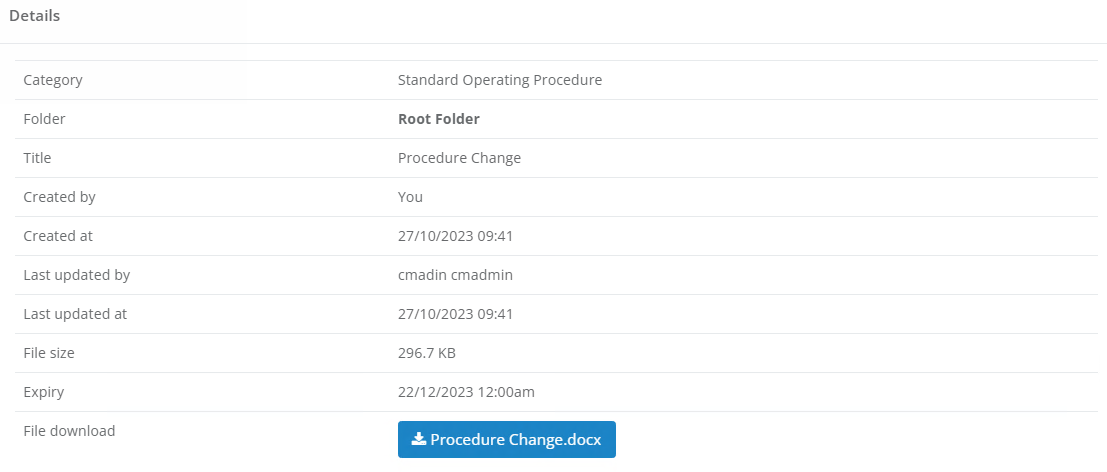
Properties - There is also specific information available about who and when the document was uploaded and last changed.
Check out, Editing documents and check-in
When a document is being edited it is marked as being "checked out" by the editing user. A checked out document:
cannot be edited or downloaded by anyone other than the checker until it is checked back in. It can be checked back in by the person who checked it out, or by an administrator by using the dropdown and selecting " Check In"

Archiving Documents
Archived documents are no longer accessible to Coordinators and Support Workers. You can manually "archive" a document by giving it an expiry date - today or a date in the past to immediately archive it, or a date in the future to automatically archive the document on that date.
Additionally uploading a new version will archive the current document.

Step 3: Participant Documents
Participant Documents can be loaded here such as:
Client Intake Forms
Consent Agreements
Service Agreements
Medical History
Funding Documents
Risk Management Plans
The Participant will also have the ability to see these Documents in the Participant App and upload new or updated versions of existing Documents if the document Category has been made Visible to Participants.
To Setup Participant Document Categories, go to the Data Menu > Participant Data > Participant Document Categories
You will have the option to add New
Add your Document Category > select Visible to Workers / Visible to Participants as required > Save
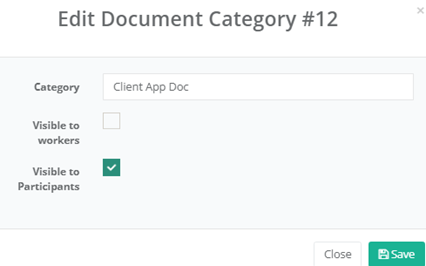
To Edit an existing Category, select Edit on the right-hand column and you can change the Category name, and toggle on/off the Visible to Worker setting or the Visible to Participant Setting.
To Delete an existing Category, select Delete on the right-hand column.
**Please note if you have any documents loaded against this category, these will need to be removed before it can be deleted.
To Upload a new Participant Document, go to the Participants Profile and press +

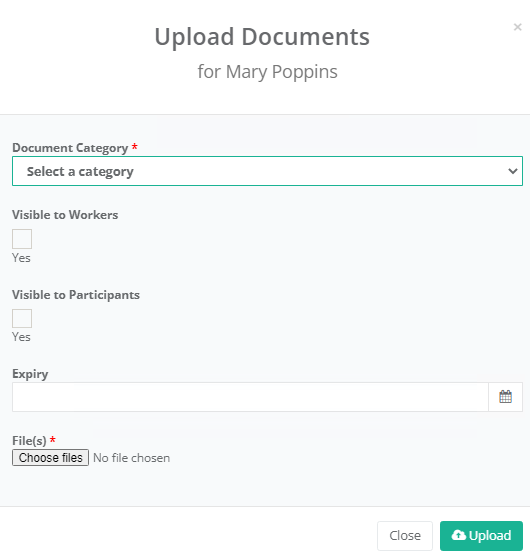
Here you can Select a Document Category, Choose if it is Visible to Workers and/or Participants via the app, Set an Expiry date and upload your required document.
The worker and client apps will not show any participant documents which have been archived.
Restrict users from viewing and creating Participant Documents based on category.
This feature allows Participant Document Categories to be visible to specific Worker groups based on a mutually applied Category.
Start by editing an existing or creating a New Participant Document Category by going to:
Data → Participant Data → Participant Document Categories
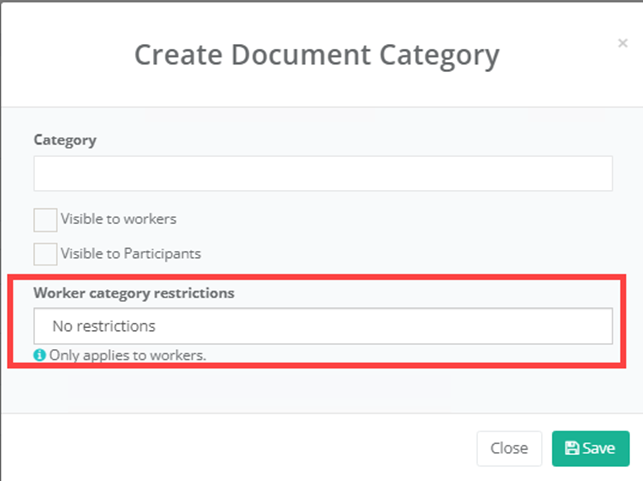
In the Worker Category Restrictions section, you can add a category and the worker will only be able to see this Document category and any documents within it, only if the worker also has the category applied in their worker profile.
To also add the category to the worker profile, go and edit the Vitals information and add the relevant selection into Category.
If you need to create a new Category for this, go to;
Data → Support Worker Data → Worker Categories
And
Step 4: Worker Documents
Worker Documents can be loaded here such as:
Signed Contracts
Position Description
Car Insurance and Registration
Licence information
Qualification Certificates
Compliance Modules
The Worker will also have the ability to see these Documents in the Worker App and upload new or updated versions of existing Documents if the document Category has been made Visible to Workers
To Setup Worker Document Categories, go to the Data Menu > Support Worker Data > Worker Document Categories

You will have the option to add a New Category
Add your Document Category > select Visible to Workers as required > Save
To Edit an existing Category, select Edit on the right-hand column and you can change the Category name, and toggle on/off the Visible to Worker setting.
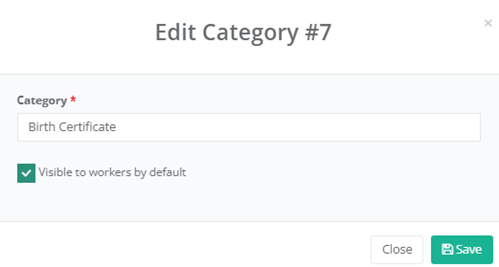
To Delete an existing Category, select Delete on the right-hand column.
**Please note if you have any documents loaded against this category, these will need to be removed before it can be deleted.
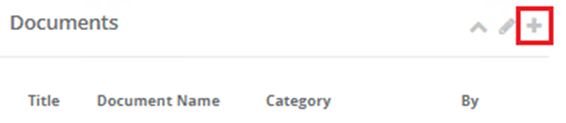
You can upload the document for them in the worker Profile in the Document section by selecting +
Add the document title and assign it to a Document Category, make it visible to workers as needed, set the expiry date if needed and Choose a file to upload;
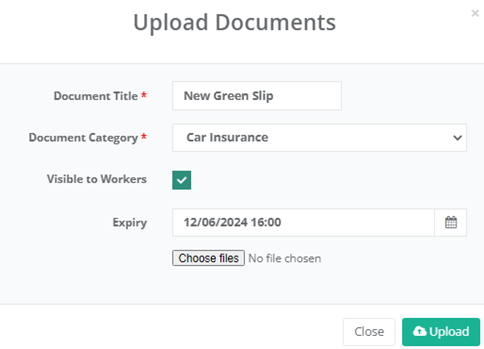
**Please note a document uploaded by a worker via the app will not have an expiry set, when you get the notification, you can go to the worker profile and edit the document to set an expiry. This will be useful in Alerts for tracking about to expire documents.
Also in the Worker app, a notification will display once a day when they login for any Expired or about to expire documents. The prior duration is determined by the Admin user and added in the Worker App settings.
Restrict users from viewing and creating Worker Documents based on category.
This feature allows Worker Document Categories to be visible to specific Worker groups based on a mutually applied Category.
Start by editing an existing or creating a New Worker Document Category by going to:
Data → Support Worker Data → Worker Document Categories
In the Worker Category Restrictions section, you can add a category and the worker will only be able to see this Document category and any documents within it, only if the worker also has the category applied in their worker profile.
To also add the category to the worker profile, go and edit the Vitals information and add the relevant selection into Category.
If you need to create a new Category for this, go to;
Data → Support Worker Data → Worker Categories
And
Step 5: Alerts
You can use the Alerts section to easily manage any upcoming Expiring or Expired Documents.
Go To Alerts in the left-hand Menu > Expired Documents
This will show you: Documents that have expired or are expiring within 30 days
Scroll down to Worker Documents and the example below expires in 5 days. Select the Worker name to go to their profile and update as needed.

Step 6: Add History to Documents
In the Tools menu, you can view the Document History.
This will show you any Time, Date and the Updating user of any archived document if it has had prior versions uploaded.
Go to Tools → History
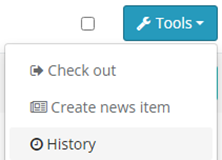
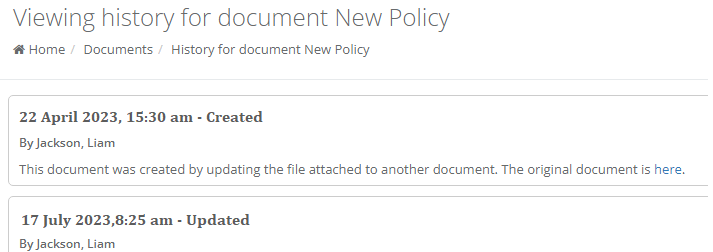
It will also store the original document in the system and it can be accessed via a connecting link.