User Guide: MYOB Invoicing Setup Guide
MYOB INVOICING SETUP GUIDE
Contents
Setting up the participants MYOB Card ID in CareMaster.
Importing the MYOB Accounts list into CareMaster.
Setting up the MYOB Categories.
How to invoice supports and generate the MYOB Invoice .txt file.
How to upload the invoice file into MYOB.
Setting up the participants MYOB Card ID in CareMaster.
All participants need to be set up in MYOB with their first name and last name. Identical to what is in CareMaster. MYOB also matches the participants Card ID field. If these do not match, their invoice data will not be imported into MYOB.
In CareMaster go to each participant’s profile and click edit in their Service Provider Tab. Scroll down to the Card ID field to enter the participants MYOB Card ID number, then press Save.
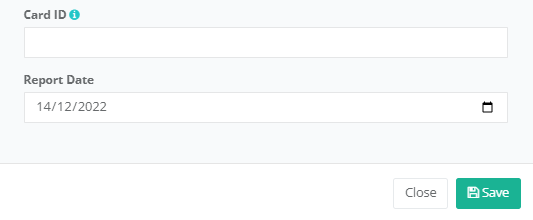
Repeat the process for each participant within the organisation.
Importing the MYOB Accounts list into CareMaster.
The file should be a .txt file exported from MYOB containing the following fields:
Account number
Name
Account type
Description
Header flag
AU Tax Code
Inactive status will be imported.
The file will need to be imported into CareMaster.
To import the MYOB Accounts list into CareMaster.
Go to Admin > MYOB > Accounts
Click on the Choose File button to select the .txt file.
Press the upload button to import the MYOB accounts into CareMaster

4.
After list has been imported into CareMaster go to menu Admin > MYOB > Settings
To assign the MYOB default services income account.
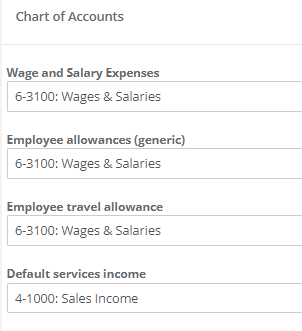
CareMaster also enables you to set an account to each service organisation and service item. (optional)
In CareMaster go to menu Admin > Service Organisations à click Edit next to the required Service Organisation.
If you wish to assign an account to a service item, go to menu Admin > Service Organisations à Service item tab. Click Edit next to the service item.
Scroll down the screen to the MYOB Integration Tab.
Click on the drop-down arrow on the left of your screen to view the integration settings
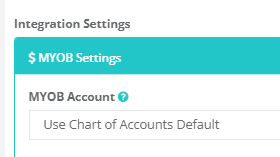
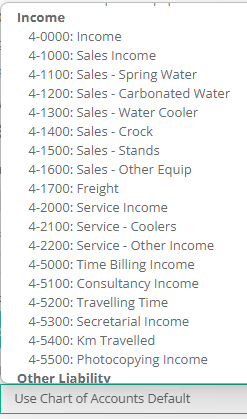
Click in the MYOB Account Field to assign the required account.
Setting up the MYOB Categories
If your organisation uses the MYOB invoicing categories go to menu
Admin > MYOB > Categories
The categories will need to be manually entered.
Click on the New Category button.
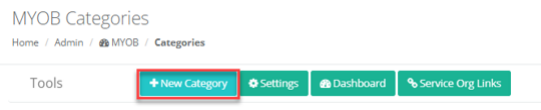
After entering the categories, click on the Service Org Links Button.
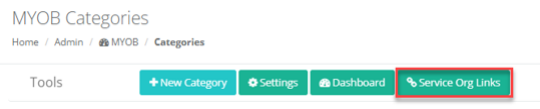
Link your service orgs with the newly created categories.

How to invoice supports and generate the MYOB Invoice .txt file
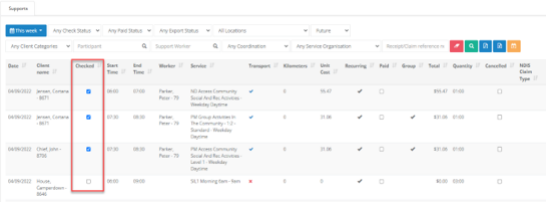
Before generating invoices ensure the supports have been marked checked.
In CareMaster go to menu Supports > All
Apply filters to view the supports such as:
Select Not Checked from the drop down
Enter the date range
Click the green filter button

Tick the supports as ‘checked’. This process will allow the supports to be invoiced
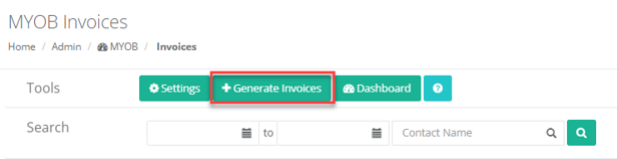
In CareMaster go to menu Admin > MYOB > Invoices
This page will display a list of invoice files that were previously generated.
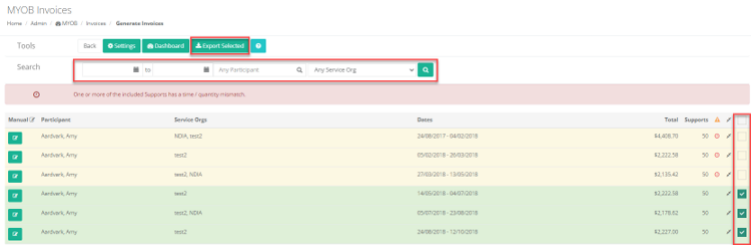
To generate new invoices, click on the Generate Invoices button. A list of all supports available for invoicing is displayed.
You can use the Search filters to filter the invoices by date, client name and/or service organisation.
Once you have the list of supports you wish to invoice, you can place a tick in the include column and click on Export Selected.
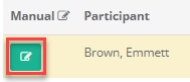
If you would like to review or manually adjust an invoice, click on the Manual button.
All the information displayed will be included in the invoice.
Any of the information in the white blocks can be manually updated. Any changes you make to the invoice will not update the corresponding supports in the system. it will only change the invoice.
You can also untick the items to prevent them from being invoiced.

If you manually edit the invoice, you will need to click on Export button.
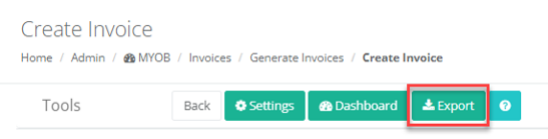

Please note if you navigate away from the page, any un-exported changes will not be saved.
After exporting your selected invoices or you manually exported a single invoice, you now have a file that you can imported into MYOB.
Click on the download button next to each invoice, on the MYOB > Invoice screen

How to upload the invoice file into MYOB
Open MYOB go to File > Import/Export Assistant
On the Welcome tab, select Import data
Go to the File Type Tab and select:
Import = Sales
Sales Type = Service Sales
Add the file previously generated in CareMaster
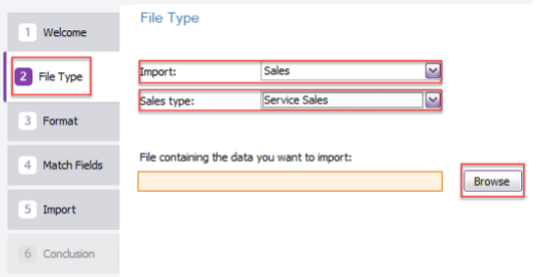
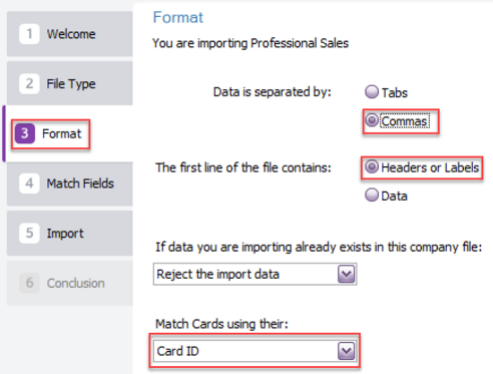
Go to the Format Tab and select:
Data is separated by = Commas
The first line of the file contains = Headers or Labels
Match Cards using their = CARD ID
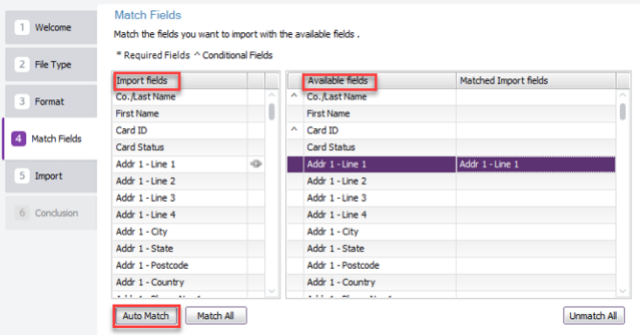
Go to the Match Fields Tab and select:
Use the Auto Match button to match most of the fields, then manually go through and match any remaining.
To manually match, click on the Import fields option in the left column and then click on the matching field in right column.
Click the Next button located at the bottom of the Match Fields Tab. If you didn’t make a backup prior to starting the import process, click Back up to make one.
Go to the Import Tab and select:
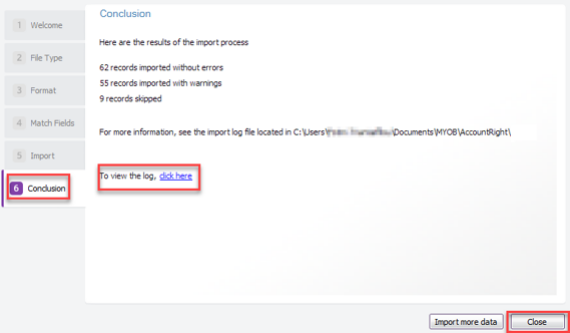
Click Import to import the data. If you get a warning or an error message indicating that the import was not successful, click on the click here option to view the import log
Once the data has finished importing, click Close.