
User Guide: MYOB Payroll setup and Timesheet guide
\
MYOB Payroll Setup and Timesheet Guide
Contents
Setting up the MYOB Payroll Categories.
MYOB Payroll Category Assignment Settings.
Assigning the Worker’s Employee Number.
Review the Worker’s Supports.
Approving the Workers Supports in CareMaster
Review the MYOB timesheets & generate the payroll export file.
How to upload the payroll file into MYOB.
Setting up the MYOB Payroll Categories
Before you can begin the timesheet process. The organisation’s MYOB Payroll Categories will need to be entered into CareMaster. The Payroll Categories are matched by name when importing timesheets into MYOB.
Please note, the Payroll Categories must be entered manually into CareMaster, identical to how they appear in MYOB. Currently MYOB does not have the function to export the categories.
To add the Payroll Categories, in CareMaster go to menu Admin > MYOB > Payroll Categories
Click on the New Payroll Category button.

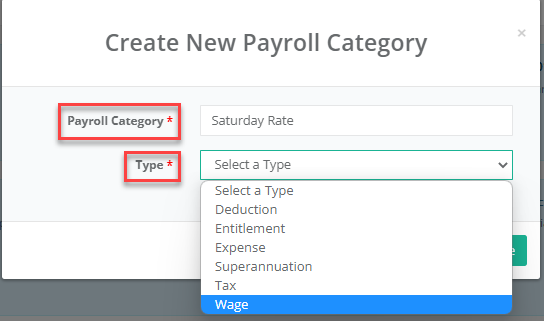
Enter the Payroll Category description and select the category’s Type from the drop-down list.
The description must be identical to how it is appears in MYOB.
Press the Save button.
Repeat this process for all your organisation’s MYOB Payroll Categories.
Alternatively, you can press the Generate Categories button to create the payroll categories automatically in CareMaster. However, the Payroll Categories will need to be entered into MYOB exactly as they appear in CareMaster.

The CareMaster Payroll Categories are created in accordance with the SCHADS Award.
To generate the Payroll Categories in CareMaster, click on the Generate Categories button.

MYOB Payroll Category Assignment Settings
After setting up your MYOB Payroll Categories, the next step is to assign the categories to the CareMaster Payroll Items Assignments and Allowances. This process will assign the correct rates to your workers timesheets. Until these have been added, no rates will be generated in the worker timesheets.
To assign the Payroll Categories to Assignment Settings.
Go to menu Admin > MYOB > Settings
Scroll all the way down the page until the MYOB Payroll Category Assignment settings.
Select the SCHADS Award from the dropdown list
Scroll down to the MYOB Payroll Categories Assignments, Default Tab
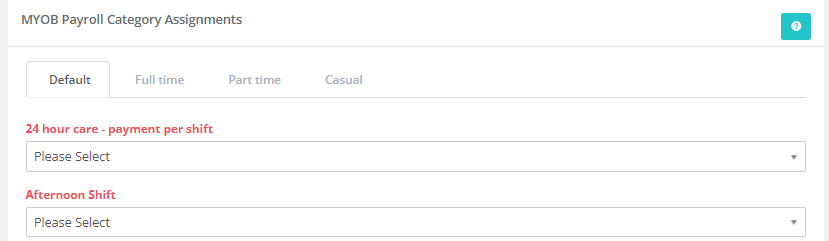
Assign the required payroll category to each assignment.

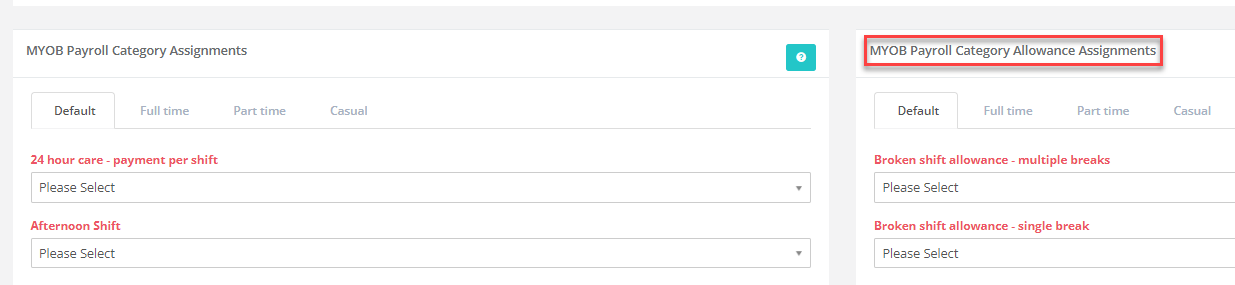
Repeat the same process for the MYOB Payroll Categories Allowance Assignments, Default Tab.
Assigning the Worker’s Employee Number
The process below will need to be completed on each staff members worker profile in CareMaster.
Go to the worker’s profile. Menu Staff/Volunteers > List.
Go to the worker’s Employment Information tab and press the Edit button.

Enter the workers employee number.
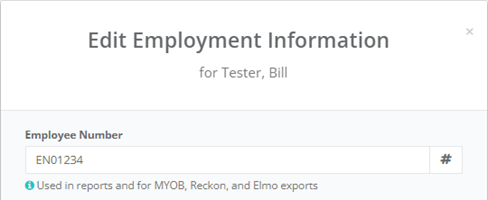
The Employee Number in CareMaster, must match the employees MYOB Employment Card ID number. MYOB requires this information for the timesheet import file.
After entering the information scroll down the screen and press the Save Button.
Review the Worker’s Supports.
This process ensures the workers supports are ‘checked’ and any missing timesheets have been generated.
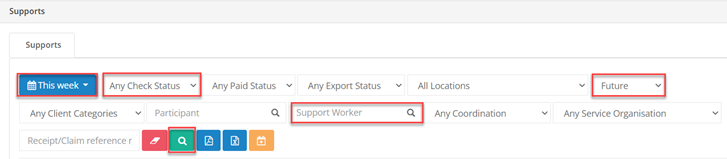
Go to menu Supports > All. And apply filters to view the supports such as:
Changing the Any Checked Status drop down field to Not Checked. (This will display the supports the worker didn’t log in/out.)Enter the date range of the pay period
Enter the Support Workers names
Changing the Future field to All. (Selecting All displays the worker’s scheduled supports and cancelled supports)
Click the green filter button, to display the required supports.
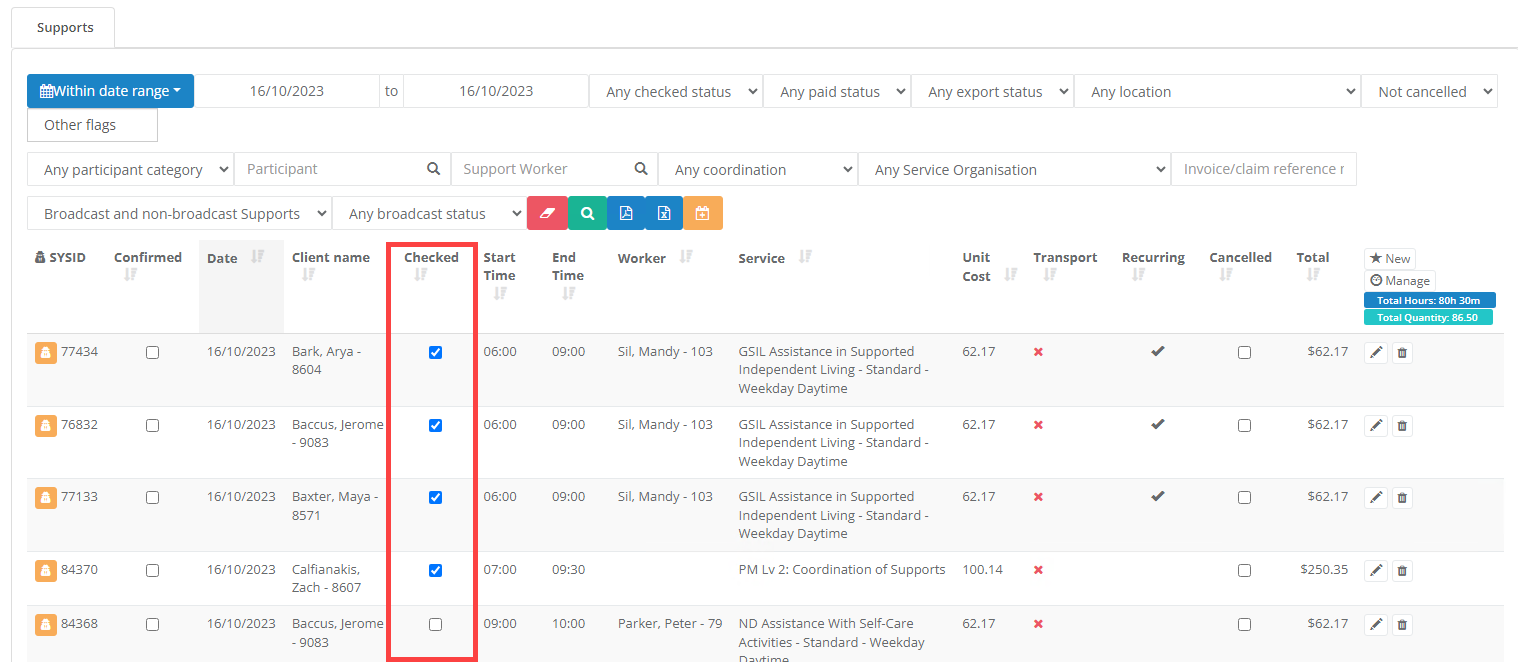
Tick the worker’s approved supports as ‘checked’. If you need to review a support, double click the support to open the support screen.
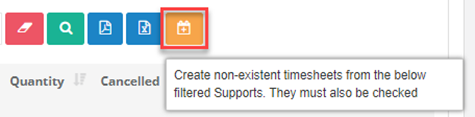
After all the approved supports have been ‘checked’ for the worker, double check your search filters are still correct then press the Generate Missing timesheet button.
Repeat this process for each Support Worker for the required pay period.
Approving the Workers Supports in CareMaster
The next step is to approve the worker’s supports in CareMaster. The approved supports will generate a timesheet for MYOB payroll.
Green = approved and ready for payroll
Yellow = yet to be approved
Red = either the scheduled time is missing, or the worker did not log off the support (Invalid time)

Go to menu Staff/Volunteers > Timesheets.
Apply the same date range filter and worker’s name, used when ‘checking’ the workers supports.
Click the green filter button.
The buttons on the left of each record allows you to Edit, Delete and Approve the support..

Review the Time [workers actual clock on/off time] versus the Scheduled Time [rostered time].

CareMaster is configured to pay the workers on the Scheduled Time.
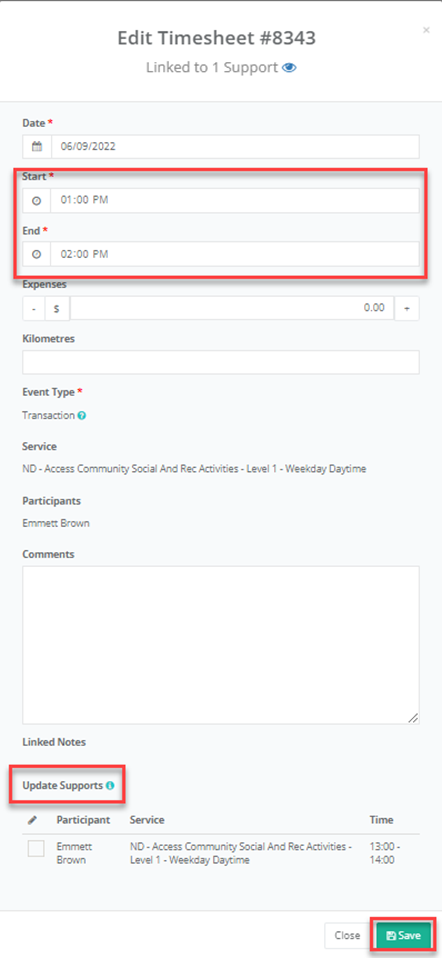
If the staff member worked shorter or longer than the scheduled support time, press the edit button, update the start/end time.
If the Support’s Scheduled Time needs to be updated, tick the check box and press the Save button
Repeat the process for each of your workers.
Review the MYOB timesheets & generate the payroll export file.
Go to menu Admin > MYOB > Timesheets.
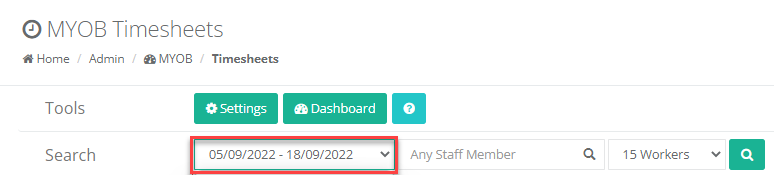
Select the payroll period from the dropdown list. .
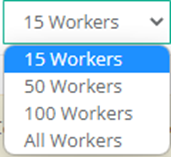
Select the number of worker timesheets to display. By default, the system will display the first 15 workers.
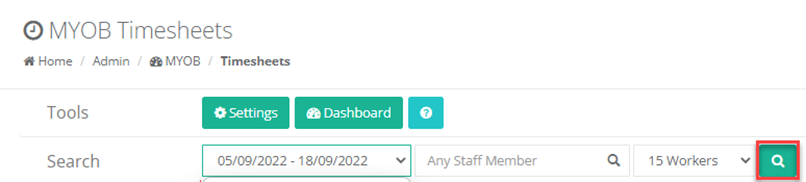
Click on the search icon. To display the workers MYOB timesheets
The summary section displays a list of workers and their total number of included and excluded supports. Click on the arrow on the right of the summary to expand the list. .

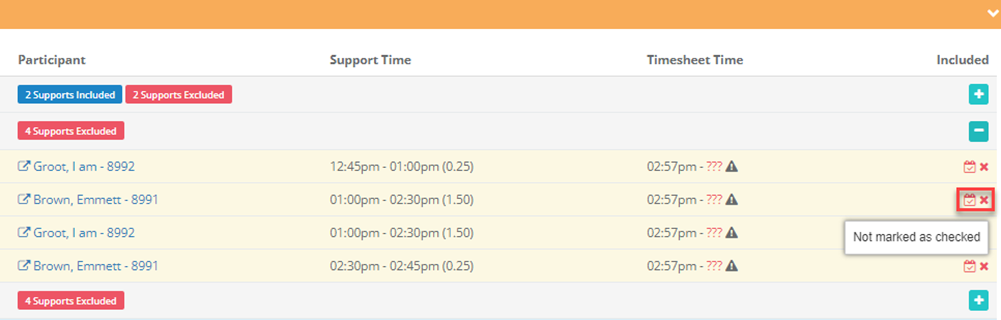
 Each worker’s name will be displayed with all their included and excluded supports for the pay period. To view a worker’s excluded supports, click on the + button on the right of the date. The list will expand displaying the supports that have not been included and excluded in the workers timesheet.
Hover your mouse over each individual red icon to view the reason, this will allow you to rectify the supports if required.
After reviewing all the workers excluded supports, refresh your screen and scroll to the Suggested Payroll Lines.
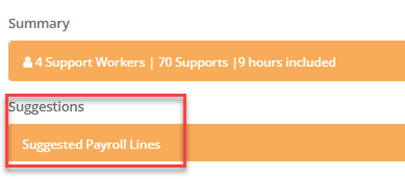
This tab displays all the workers included timesheets and allowances. The timesheets are sorted by the workers name and date. The workers timesheet details can be modified if required.

If an additional payroll line needs to be added for a worker, scroll down the screen and click the Add Payroll Line button.
Enter the required information in each field.

During this process, do not navigate away from the timesheets screen. Any changes made to the workers timesheets will not be saved, until the MYOB Payroll Export file has been generated.
After reviewing all the workers timesheet entries. Press the Export button to generate the MYOB payroll .csv file.
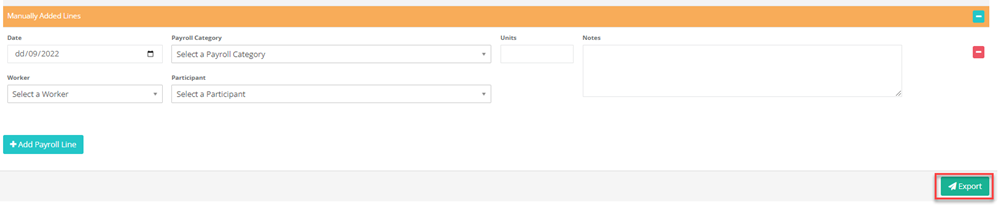
The export file will download to your system and is ready to be upload into MYOB.

\
How to upload the payroll file into MYOB.
Before you start your import, be sure to make a backup of MYOB. That way you can restore the backup if the payroll import is not correct, or you run into any issues.
In MYOB go to File > Import/Export Assistant
Click on the welcome tab and select Import data. Then click the next button.
On the File Type tab next to Import, select Timesheets from the dropdown list.
Then click on the Browse button to add the generated payroll file.
After selecting the file click the next button
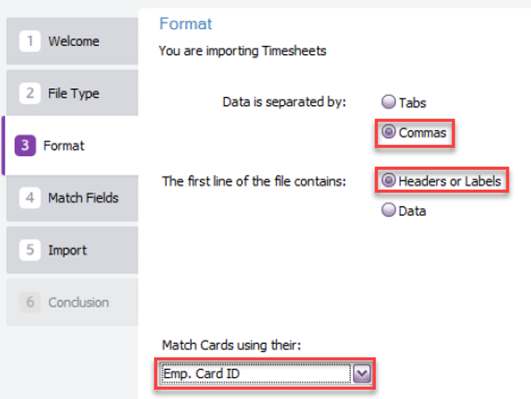
Go to the Format Tab and select:
Data is separated by = Commas
The first line of the file contains = Headers or Labels
Match Cards using their = Emp. Card ID
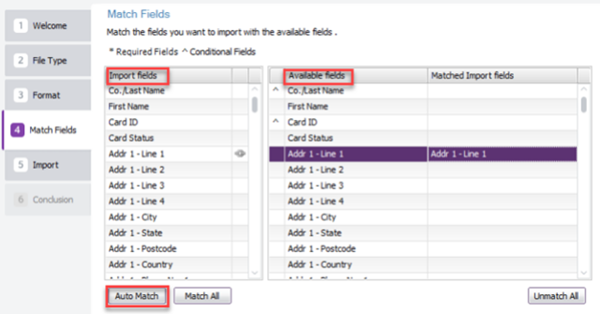
Go to the Match Fields Tab and select:
Use the Auto Match button to match most of the fields, then manually go through and match any remaining.
To manually match, click on the Import fields option in the left column and then click on the matching field in right column.
Click the Next button located at the bottom of the Match Fields Tab.
On the Import Tab, you will be prompted to make a backup prior to starting the import process, click Back up to make one, or press the import button to continue.
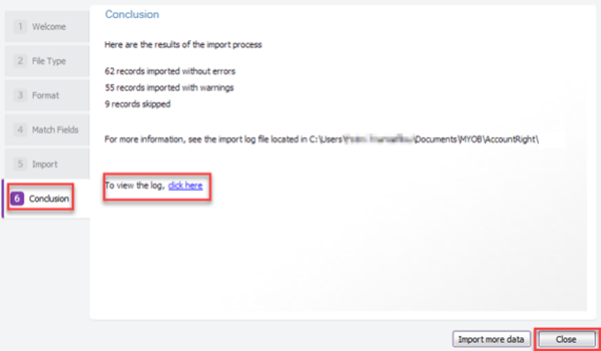
Go to the Conclusion Tab:
If you get a warning or an error message indicating that the import was not successful, click on the click here option to view the import log.
After the data has finished importing, click Close.
\