
Vouchers
The vouchers button allows you to manage Vouchers. Unlike the previous views, the client selected doesn’t necessarily affect the contents of the main window. You can change what is shown by using the options at the top of the screen.

Selected Client Only: Only shows vouchers that have been assigned to the client currently selected Clients With Voucher: Update the client list on the left to only show clients who have vouchers Voucher History: Only usable if ‘Selected Client Only’ is ticked. Each voucher is only shown once, to see the history of the voucher you can double click on it to open. By ticking this box each voucher action will be shown in the main part of the screen. Assigned Vouchers: Only see the vouchers that are currently assigned. Clients Allowed Voucher: Update the client list to only show the clients who have ‘Allowed Voucher’ ticked in the Extra tab in their client record.
\n Clicking on the first button gives you this window:
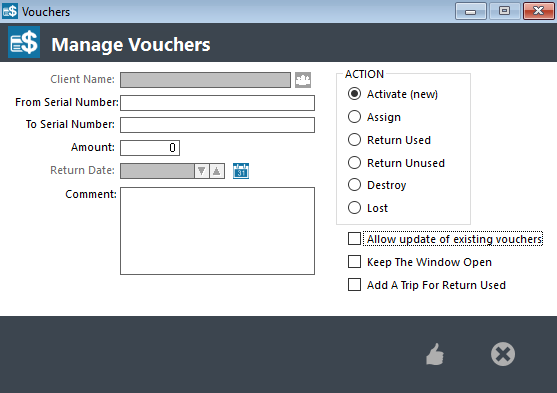
You can choose to perform actions on a range of vouchers at once if you wish. Enter in the serial number(s), select an action from the right and then fill in the rest of the fields as appropriate. Fields will fill themselves in or be greyed out depending on the Action selected.
\n Click on the thumbs up at the bottom when finished. There are also some extra options you can use that might assist: \n Allow update of existing vouchers - Tick this to allow existing vouchers to be edited or changed as well as new ones. \n Keep the window open - If you are performing multiple actions, keep this window open so you don’t have to reopen it after clicking on the Thumbs up. \n Add a Trip For Return Used - If ticked, when returning a voucher for a client a trip record will be automatically created.