
How do I add a new Worker?
As part of the onboarding process, we will do a basic import of a list of users you have provided us.
To create additional Staff/Volunteer accounts, you can either click the New option in the Main Menu:
Or, if you are already in the list of Staff/Volunteers, click the New button on the top right of the table:
Either option will take you to a wizard that will walk you step by step through creating a new worker record.
- Basic Information
This step is where you fill in the Staff/Volunteer's First name, Last name, DOB, Gender, Location and Coordinator.
If your organisation has more than 1 location and the Staff/Volunteer will only be assigned to one location, this is where you select that location – this will only work if locations have been set up in Data.
Once you have entered all the information needed, click the green next button.
- Address
This screen allows you to enter in the Staff/Volunteer's address details and contact numbers.
Once you starting typing in the street field, it uses Google Addresses to provide a number of suggested addresses. When you see the one you want, click on it to auto fill out the rest of the address fields.
Google Chrome may prompt you to give CM access to your location in order to provide suggested addresses. Click Allow if you want to use the Google Address suggested options.
Once you have picked an address, it will display a map with the selected address location. Verifying the address isn’t necessary, but is recommended as this enables you to more easily find participants that are nearby the worker when creating supports. If it is correct then click Yes.
If the map location is incorrect, you can click on the red Pin to drag it to the correct location then click Yes. If it changes the address after saving the location manually, you can then change the address without needing to click Verify.
Once the address fields have been completed; you are able to add Contact Numbers for the Staff/Volunteer:
Mobile Number: The current mobile/contact number for the staff/volunteer - this field can also be left blank, but it is advised to fill in this information as it is linked to the SMS/Email Notifications for Supports/Transactions.
Phone Number: If the staff/volunteer that you are entering has a landline or work number, this can be entered here - this field can also be left blank.
Once you have finished entering any required information, click the green next button.

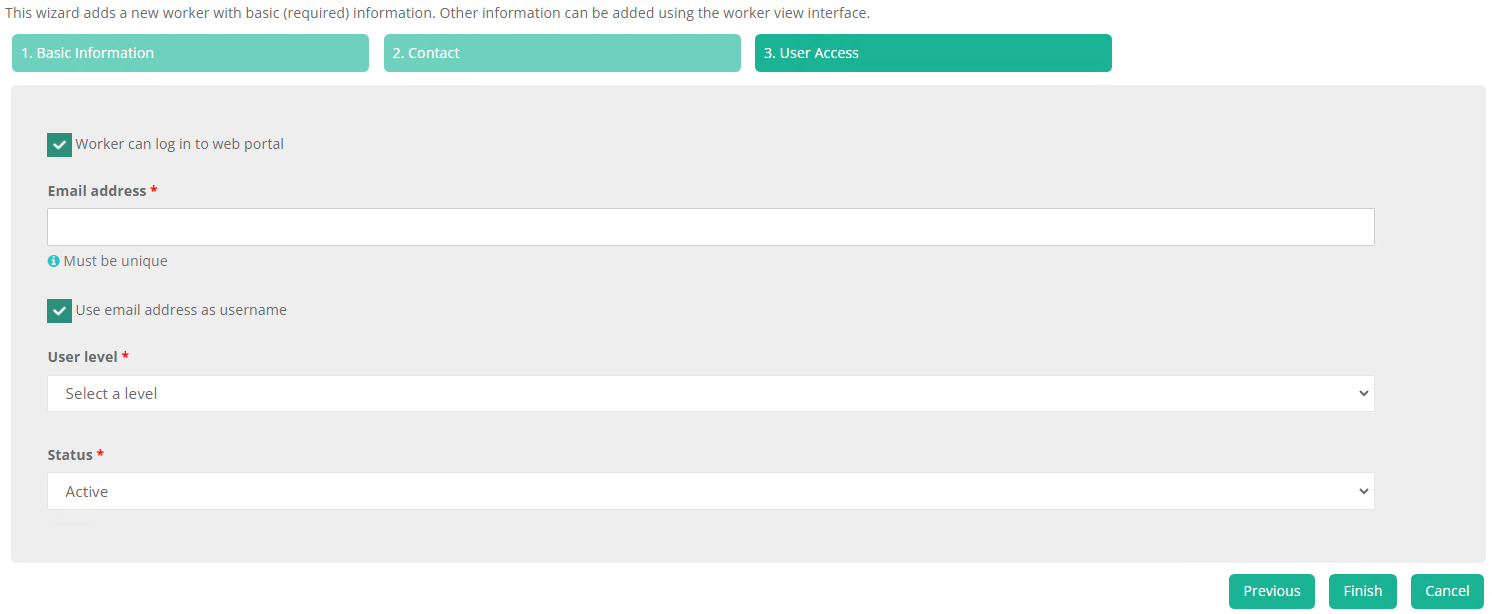
3. User Access
NOTE: This step is important as it links this information with the App Login Details.
Choose if you allow the worker to also access the Web Portal.
 In the fill-in field provided enter a unique and valid (working) email address for the Staff/Volunteer - the email address is what a worker uses to log into the worker app.
Select if you want to make the login username the same as their email address. If you update their email address later, their username will also change

Using the drop-down select the user level.
- Administrator
- Coordinator
- Worker
Enter in a username and password for the staff member.
Last step is, using the drop-down provided Select whether the Staff/Volunteer is:
- Active
- Waiting
- On-Hold
- Inactive
Then click the Finish button to save the new Staff/Volunteer and be taken to the workers profile.
Next: Add Participants