
User Guide: Staff/Volunteers
Summary This document provides a detailed guide to all areas of the Worker Profile. This will enable you to add, configure and utilise all options and features to maximise the available output for Rostering, Support allocation and personal profile management.
Step 1: Searching for Workers
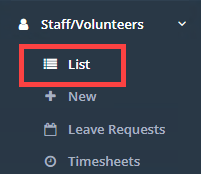
This is accessed by selecting Staff / Volunteers → List from the main menu. Common uses of this page include creating a New worker and/or accessing an existing worker record.
The first thing you'll see up the top of the page are a range of filters you can use on your list of Workers. By default, Active Workers will be shown.
You can also search by All or Inactive and then type in their name or filter further by Location & Category.

You can change what client columns display in the client list by going to Data → Support Worker Data → Support Worker Display and then dragging columns to either the unassigned or assigned columns.
Please note: from anywhere in CareMaster, you can go directly to a worker's record by using the search bar up the top of the screen.

Step 2: Vitals
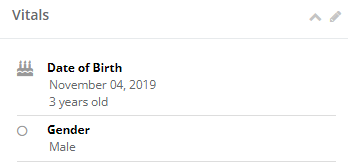
This section has basic worker information such as:
Name / DOB / Gender / Country / Language / Ethnicity / Religion / Categories
– Multiple categories can be applied and are used for filtering / searching
Step 3: Contact Information
This will list in summary as their Current Address and Main Email Address and their Notification / Alerts preference.
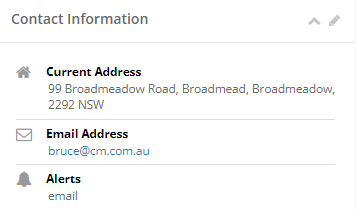
Edit here to edit any details such as:
Primary address / Postal address / Other contact details / Emergency contact information / Next of kin information / Support Worker Alerts – select Email / SMS or Do not send - this is to ensure the worker notifications are received correctly for new shifts and shift changes
Step 4: Services for this Fortnight
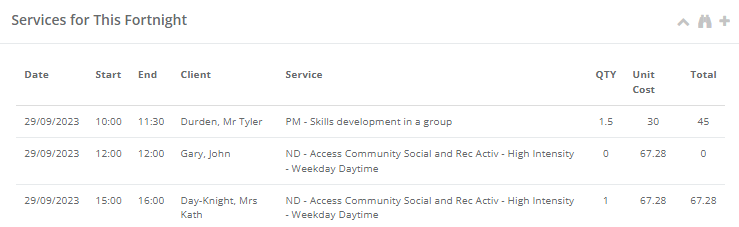
This will show any rostered supports for this worker within the current fortnight. It will display 5 supports on the profile page and you can select search

to open a more detailed search.

You can also create a support from the main summary page by pressing the + button.
Step 5: Availability
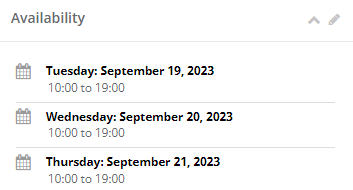
Edit this to add new availability or make any changes to existing availability.
You can add the Availability as a single duration;

Or a split duration;

Press
 to fill down the top row of data to the rest of the fortnight.

**Remember you must set an End Date or the Availability entered will only apply to the listed days.
The worker can submit a new availability via the Worker App and it will be sent for Approval to the worker’s Coordinator. If no Coordinator has been added into Organisation Information, the worker will be unable to submit this.
Step 6: Leave Requests
You can see any submitted Leave requests for the future listed as Pending or Approved.
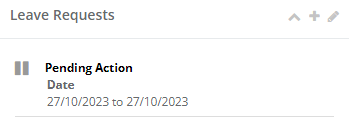
Click the + to add a new request or

to edit the current requests.
Here you can add a New Leave request.
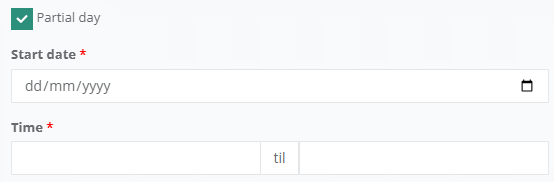
Tick Partial day and enter the Start date and the time required.
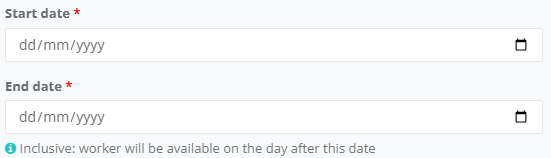
If a full day(s) requested, enter the Start and End date;
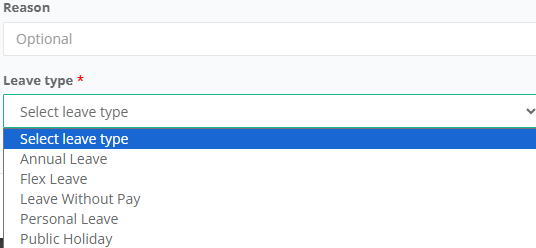
Add a reason (Optional) and then select an available Leave Type and Save
*If you need additional Leave Types, these can be created in Data → Support Worker Data → Timesheet Events.
To review existing requests, these are listed below and can be searched to find any specific date range.
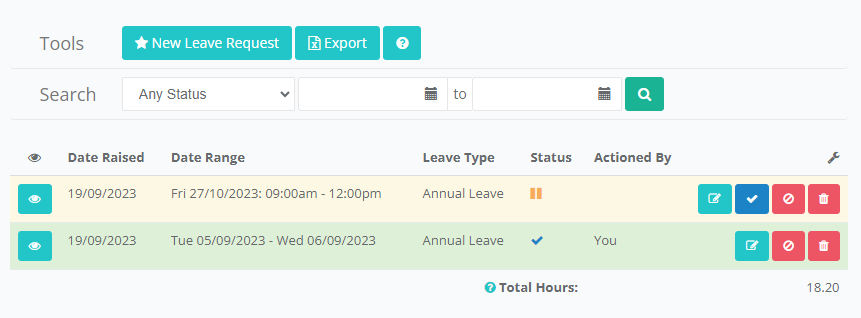
To reject a leave request, simply click

To approve a leave request, simply click

When the status is pending it looks like

When the status is approved, it looks like

To delete a leave request, simply click
**Please note** once a Leave request has been deleted it cannot be restored
*The setting "Notify worker when actioning leave request" is currently ON. When approving or rejecting a leave request, an email will be sent to the worker.
- The worker can submit a new Leave Request via the Worker App and it will be sent for Approval to the worker’s Coordinator. If no Coordinator has been added into Organisation Information, the worker will be unable to submit this.
Please note that the hours for approved leave are not transmitted to the organisation's financial system. When a leave request is approved in CareMaster, it results in the temporary removal of workers from their scheduled supports during the designated leave period.
**Notifications that staff have entered leave will only be sent if the worker enters leave via the worker app. Notifications will not be sent if the worker enters leave via the desktop
Setting Available (Settings > Worker App Settings) - For workers with no coordinators, select individuals to send notifications to
Allows an additional Admin or Coordinator to receive a notification if the leave requester does not have a Coordinator. i.e. it is a coordinator requesting leave
Step 7: Notes
rea is where you can add notes specific about the worker.
Click the + to add a new request.
Select a Note Category, input your Note information, upload a file if required and Save.
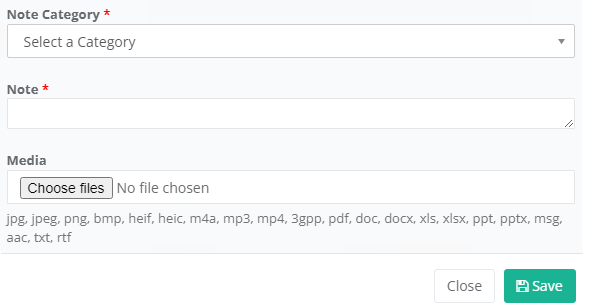
If you need to make a new Note Category, go to Data → Support Worker Data → Support Worker Note Categories.
*The worker will not be able to see their own notes in the App or in the Web Portal.
Step 8: Organisation Information
In this section, you can allocate a Role or multiple roles to your staff.
If you are an Administrator, you can also be a Coordinator, a Worker and a Volunteer.
For a worker to be added to a support as a worker they need to have a User Status of worker or an Additional assignment type of worker.
These options below are available for an Administrator.
You only have options for lower access levels depending on your core access level.
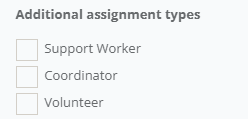
User Level - If worker selected, you can also choose if they can log into the web portal or not.

Username - You can select to Use email as username and update email address

Status: Active / Waiting / On hold / Inactive – Remove them from all future Support assignments, Delete all future Timesheets & Remove them from all Participant record
Worker Assignments – This will display your Core access level
Additional assignment Types – Volunteer / Worker / Coordinator Coordinators –
The next 4 dates are used to track the worker employment date markers
Referred by / Apply date / Trained date / Start date
These below are used for greater Categorisation / Grouping and filtering
Location / Departments – See User Guide: Departments
Step 9: Support Worker Interests
This section allows you to add personal information about the worker. This can also be updated directly from the Worker App by the worker.
For the Interests themselves, you can select from the in-built dropdown list.
To add more of your own, go to Data → Miscellaneous → Interests
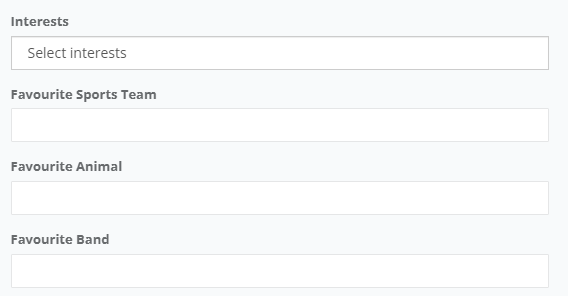
The favourite sports team / favourite animal and favourite band are available for direct typing input.
Step 10: Custom Fields
While CareMaster has many different sections in the Worker and Participant profile to add specific information, each organisation is different and may want to create their own specific fields. This section enables users to create fields and save any type of additional field.
First go to Data → Miscellaneous → Custom Fields to create your new Custom Field type.
You can sort existing Customer Fields by Worker Visibility and Who it is Applicable to.

Press
 to create a new one.
Enter a Name for this field and a brief description to help users input the information.
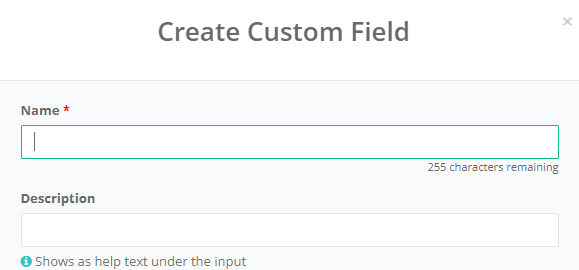
With this field being so customisable, we have created many different input options for your required data. It will also show you a Field Preview before saving.
Select from:
Checkbox
 Colour
  Date
Date  Datetime Local
  Time
Time  Email
Email  Number
  Phone
Phone  Test area (resizable)
  Text
Text 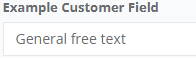
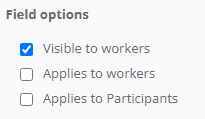
Once you have selected your preferred input method, you can now select if it is:
Visible to workers
and
If it applies to Workers
If it applies to Participants
Or both
Step 11: Security
This section will enable you to Setup 2 Factor Authentication for your Web portal and App users.
It can be activated in Settings located at Settings → System Settings → Security → Require two factor authentication for all users.
Once activated the users will be prompted to set up 2FA on their next login. If already logged in, only each user will be able to set this up on their individual Worker Profiles
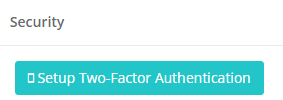
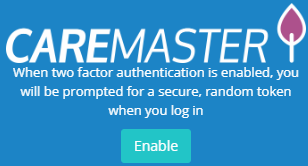
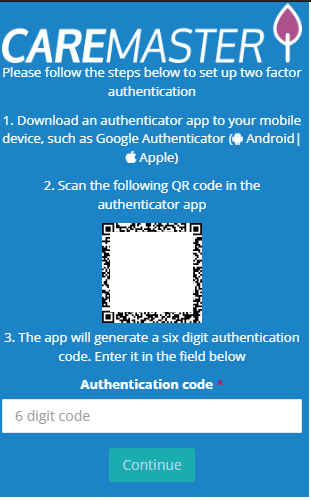
Use your preferred Authenticator to complete the process and to also generate the code each time you go to login.
Step 12: Service Preferences
This section is where you input specific information on a Worker profile that can then be matched up to allocate to a suitable Participant when rostering.
This can be used via the Filters section when looking for a worker. To match to a Participant, they must also have this section completed in their participant profile.
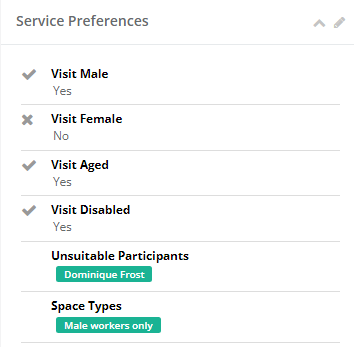
The Summary will show as per below:
When you edit this section, you will have the following options;

This section will allow you to configure a specific filter.
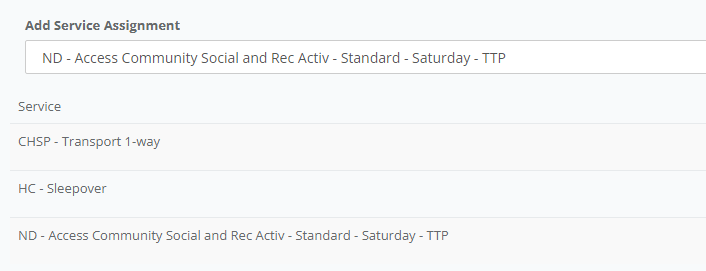
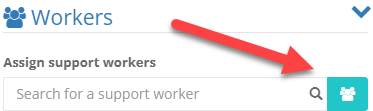
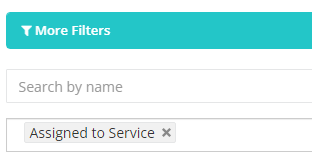
When you are editing / creating a support, go to the Workers section and find workers. Then add the filter of ‘Assigned to Service’
Unsuitable Participants – If you add a Participant name here, it will not allow you to allocate that worker to that participant. They will not show as an available option.
Unsuitable Workers – This will not let you add a worker to a group support if the other worker is also applied.
The below options are used in the Worker Filter section. Input as No Answer / Yes or No
Visit Male Participants / Visit Female Participants / Visit Aged Participants / Visit Disabled Participants
Space Types
These are specific attributes that a person or their vehicle has that will also be added to the participant profile. It is used as a Filter option for roster matching workers to unallocated supports.
Such as;
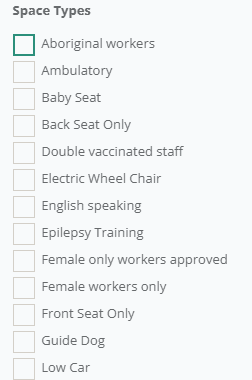
These can be created / edited / deleted by going to Data → Participant Data → Space Types
Step 13: Qualifications
You can enter specific information here to track and view worker Qualifications.
There are many pre-configured qualifications available to select from or you can create your own.
You can view these in a report by going to Reporting → Staff/Volunteer → Worker List export.
Vehicle
Drivers Licence number / Licence Type / Licence Expiry / Vehicle Registration number / Vehicle Registration expiry / Vehicle insurance Provider / Type of Insurance – Third Party or Comprehensive / Vehicle insurance expiry / Driver Assessment – Date / Driver Authority – Authority to drive a Bus or Coach
Medical
AHPRA number – was RN/EN number / CPR certificate expiry / First Aid certificate expiry / Medical certificate expiry – Medication Trained
Safety and Security
Police check date / Police check expiry / Police check reference number / Working with Children Check – links to an online verification process / Working with Children Check expiry / Working with Vulnerable People expiry / Manual handling expiry
NDIS
Worker Screening Application number / Worker Screening check number / Worker Screening check date / Worker Screening check expiry / NDIS orientation module completion date
Additional Qualifications
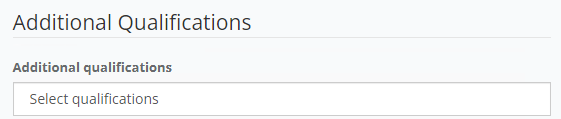
Here you can add your own specific qualification types specific to your organisation.
To add a qualification to the list go to Data → Support Worker Data → Qualifications.
Step 14: Employment Information
This is an important section specifically in making sure your workers Payroll setup is fulfilled.
Employee Number – Must be input for MYOB, Reckon, and Elmo exports
Employee Code – Used in reports only
Standard days – a guide to recommended working days per month
Standard Hours (Fortnightly)Requested Hours (Fortnightly)Max Hours (Fortnightly) – used to flag an Alert when rostering over these hours
Employment Basis – Full Time / Part Time or Casual – must be completed for payroll integration
Contract review date
Probation review date
Business insurance expiry
DWES Clearance expiry
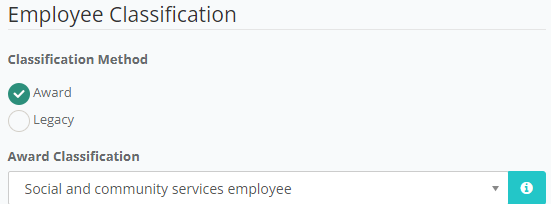
Employee Classification – must be completed for payroll integration
You have 2 options here.
Select Award to choose from the SCHADS Award or Childrens Services Award;
Then choose the sub classification within. i.e.
Social and Community services employee OR Home Care Employee – Disabilities Etc.…
Now choose the Classification Level and Pay Point
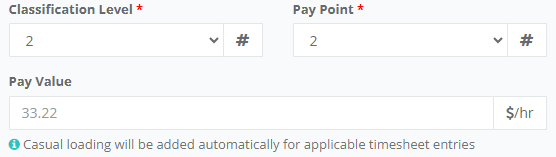
You can pay higher than the award value by typing over the shown rate as shown below
*It will not allow you to pay under the selected Classification level and Pay point
How to set pay rate for employees on above award rates
To update a worker to award to above award rates locate the employee in CareMaster.
Edit the Employment Information
Select the Classification Level and Pay point closest to the rate per hour the worker is being paid at and overwrite the Pay Value to what the hourly figure needs to be.
Select Update and Close
Then on the same worker you will need to Send to Xero for this information to be updated in Xero
**For Casuals, you need to know if the base rate INCLUDES the casual loading or if this is added later as part of the payroll process.
If it is included in the base rate you need to configure a setting to let the system know.
Go to Settings → System Settings → search for Casual and tick the box OFF for ‘Casual Loading is added separate from Ordinary Rate’
Then tick the boxes for Uniform and First Aid depending on your own business rules.
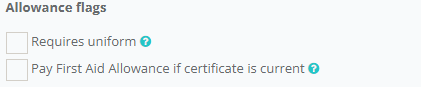
Select Legacy
Add a description name as a reference in Employment Classification and then input the Pay band i.e. 37.25 as the pay rate.
Allow an 8 hour only break minimum
If you have a written agreement with your worker about having a minimum 8 hour break instead of a 10 hour break that will NOT incur overtime, then select this box below. This will adjust the SCHADS Award to not pay overtime for this reduced break period.

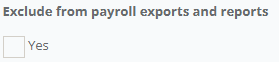
Finally select if you want to Exclude from payroll exports and reports. Some workers are setup for different purposes and you may not want them to appear in any reports.
Step 15: Participants
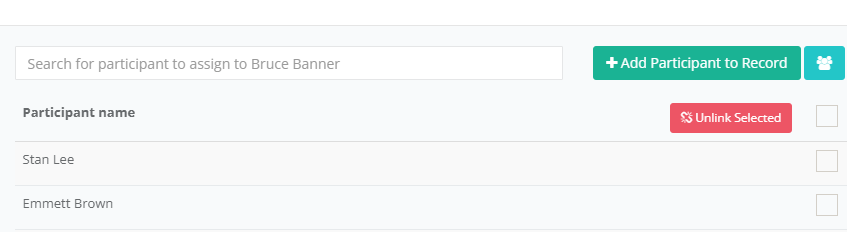
This section lists all the Participants the worker is assigned to. Assigning a worker to a participant will give the worker increased participant profile visibility in the worker app.
You can edit the list here and
 or remove any existing participant links
Section 16: Documents
The worker can upload documents here directly from the app and they can also be directly added via the web portal.
To add a new worker document category, go to Data → Support Worker Data → Worker Document Categories.
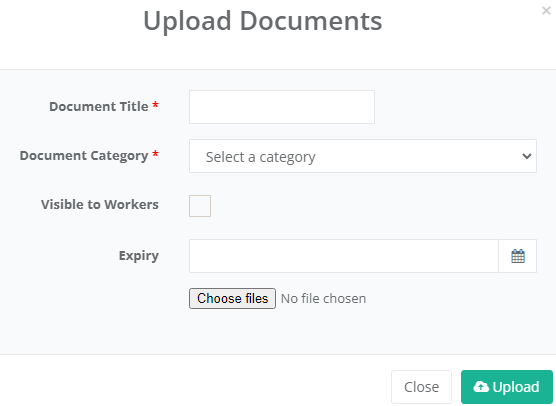
To add a new document, press +, add a Document Title and assign a preexisting category.
You can choose if this document is visible to workers and then set an expiry date.
 You can view any expiring documents by going to Alerts → Expired Documents.
It will show you

This is a great tool to assist with worker document profile maintenance.
*Any document uploaded via the worker app will not have an expiry set. You can edit this section and add an expiry.
It can also be configured to send a notification to the worker’s coordinator.
This is actioned in Settings → Worker App Settings → Document upload notification.
Refer to our Document Process Guide for more detailed information.
Restrict users from viewing and creating Worker Documents based on category.
This feature allows Worker Document Categories to be visible to specific Worker groups based on a mutually applied Category.
Start by editing an existing or creating a New Worker Document Category by going to:
Data → Support Worker Data → Worker Document Categories
In the Worker Category Restrictions section, you can add a category and the worker will only be able to see this Document category and any documents within it, only if the worker also has the category applied in their worker profile.
To also add the category to the worker profile, go and edit the Vitals information and add the relevant selection into Category.
If you need to create a new Category for this, go to;
Data → Support Worker Data → Worker Categories
And
Section 17: Vaccinations
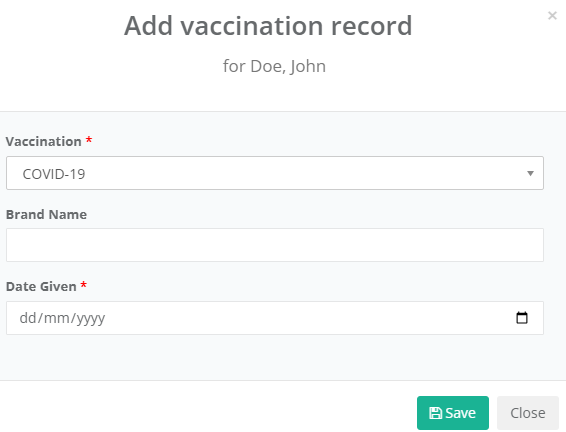
Here you can add a Vaccination History for Workers.
You can select the relevant Vaccination and enter a Brand Name and a Date Given.
If you want to create more Vaccination types, go to Data → Miscellaneous → Vaccinations.
Section 18: Sync Status
This section shows you the worker status for the available integrations primarily used for Timesheets and Payroll purposes.
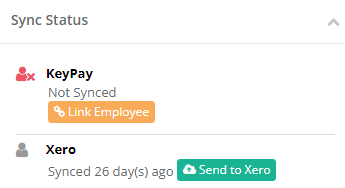
It will display the current status and has built in quick links to link or update the worker status.
This will need to be re synced if you have changed the worker’s Payrate or assigned them to a different Payroll calendar.
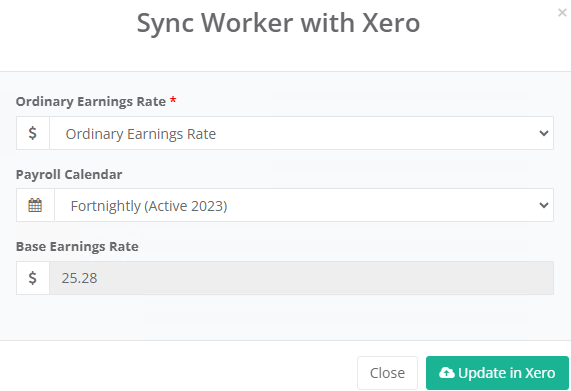
Press Send to Xero, update the settings and then update in Xero. This will make sure the correct pay information is used in when the next payrun is actioned.
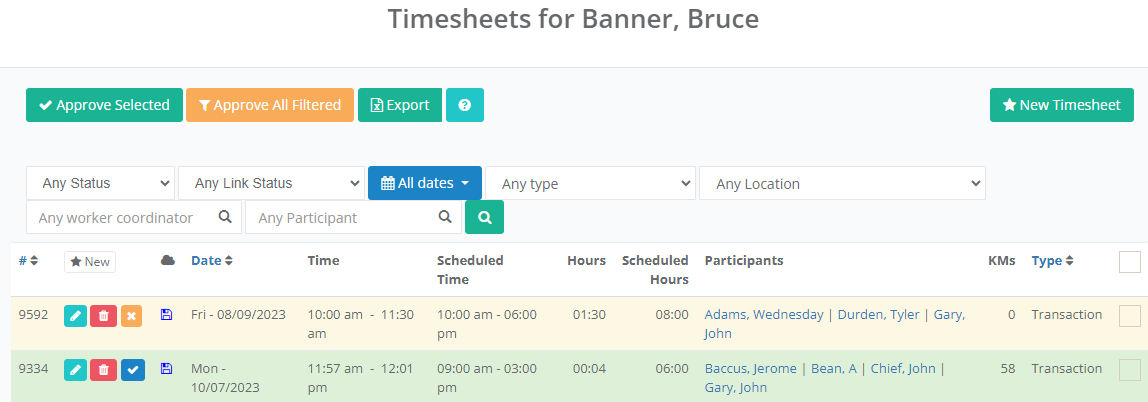
Section 19: Timesheets
Here you can search, view and approve/decline any existing timesheets specifically for this worker. You can also create a new timesheet from scratch. It has all the same functions as the Staff/Volunteers → Timesheets page.
Section 20: Custom Consents
This section is available for you to create your own required consents.
Currently in the Participant Profile → Funding Information there are the NDIS required consents listed: Consented to provide details & Consented to future contracts.
As each organisation is different, you may wish to create your own Consent types for your workers. You can search for any existing consents based on the below filter options:

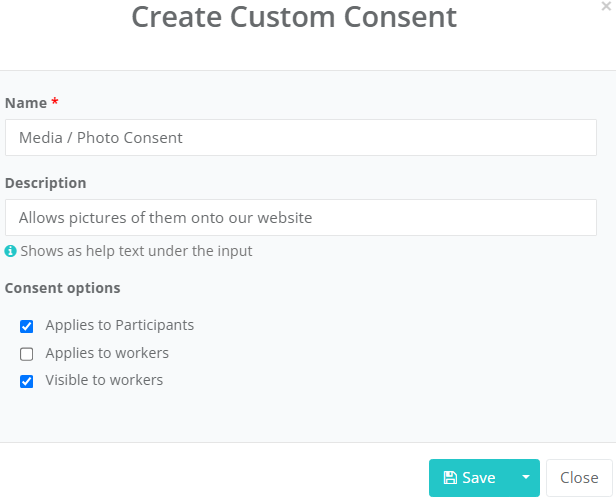
To Create a new Consent type, go to Data → Miscellaneous → Custom Consents
Click
 and fill in the Name, Description and choose if it applies to Participants or Workers (or both) and if it is visible to workers in the app.
To add a consent to a Worker Profile, select edit .

It will already show the available consents if you want to apply one to the Worker profile, select

This will then ask for input for:
Consent Given – Tick if confirmed
Applies from
Review on
Expires on
Notes
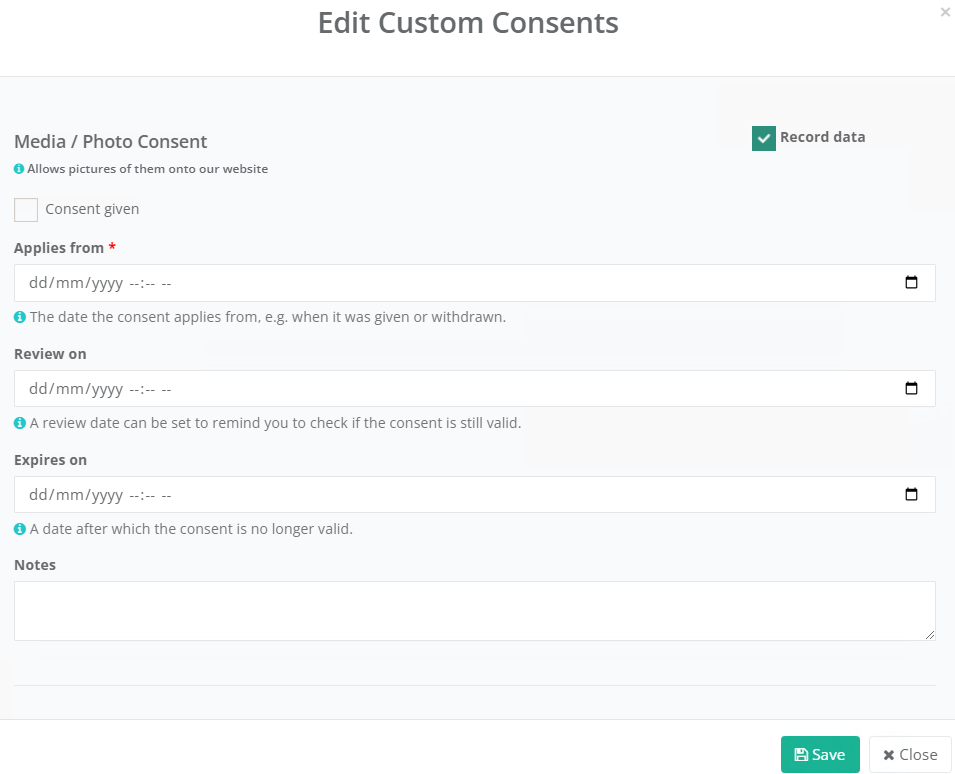
And Save. This consent is now visible on the worker profile.