
User Guide: CareMaster DEX Integration and Service Export Guide
DEX Integration
Before you begin the CareMaster and DEX integration process, make sure you've completed the application for a Department of Social Services (DSS) System Account.
Please note that it may take several weeks for your password to be generated.
If you don't have access to the DEX portal, you won't be able to proceed with the integration with CareMaster.
Step 1: Request a DSS System Account
The following steps provide guidance on how to initiate a request for access to the DSS Data Exchange and apply for a 'System to System' account with DSS.
1.
Establish access to the DSS Data Exchange Web Portal.
Click on the link below for additional information and refer to the quick start guide. This guide offers additional information to assist you in getting started with the DSS Data Exchange.
https://dex.dss.gov.au/document/46
2.
Once you've successfully logged into the DSS Web portal, proceed to create an Outlet, along with any additional Outlets, Programs, and Activities needed.
For detailed instructions, consult the DSS guide below.
https://dex.dss.gov.au/document/271
3.
Request a System Account from the DSS Data Exchange.
Please note that this is separate to user access. If you have not previously utilised the 'System to System' transfer feature, you must complete this step.
https://dex.dss.gov.au/dex-user-access-request-form
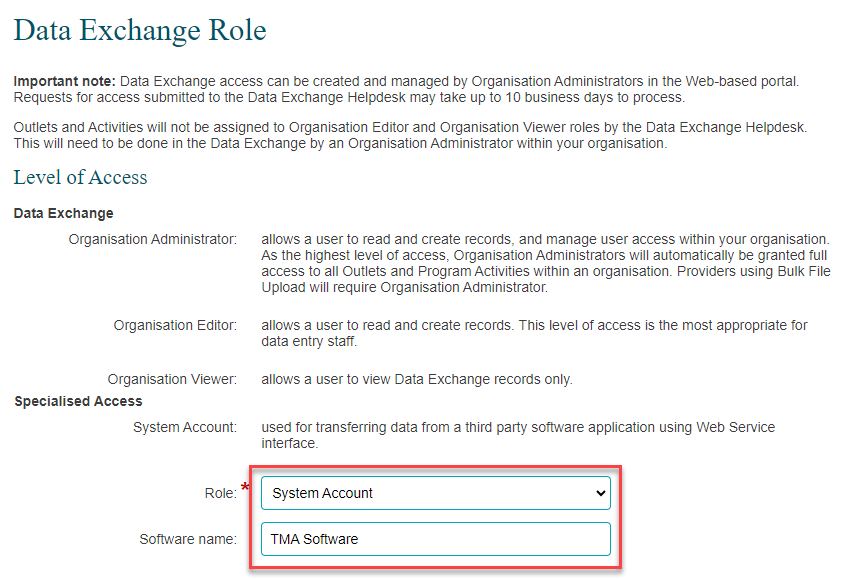
When filling out the Request Form, make sure to fill in this section as per the screenshot below.
4.
Upon successfully filling out the request form, you will be sent additional instructions via email. These instructions will provide you with new login credentials specifically designed for use within CareMaster.
It's important to note that these credentials are entirely distinct from the login information you use to access the DEX portal directly.
Step 2: DEX Integration with CareMaster
Before initiating the DEX Integration with CareMaster. Contact the Customer Care Team to activate the DEX Integrations menu in your CareMaster Database.
Once the DSS DEX system account credentials are received, the integration process between CareMaster and DEX can begin.
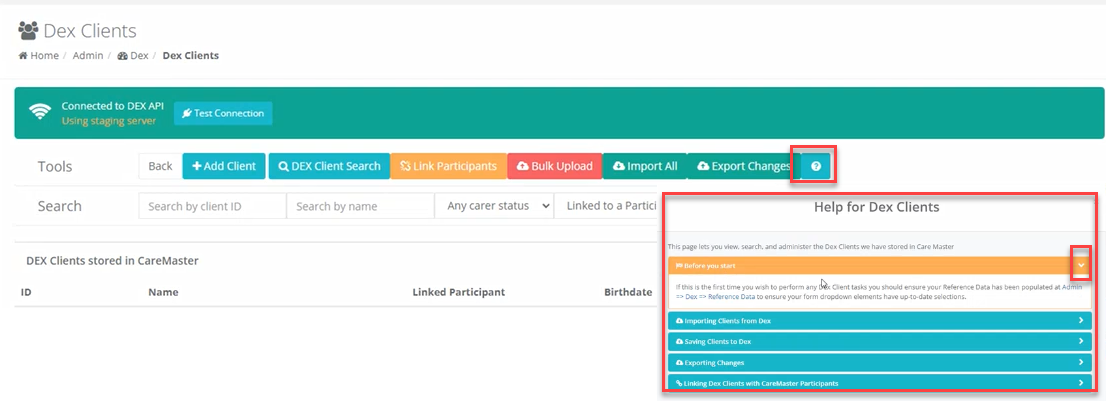
In CareMaster go to menu: Admin→ Integrations→ DEX→ Dashboard
To find additional information about the tabs shown on the Dashboard, please refer to the help files located within each respective section.
1.
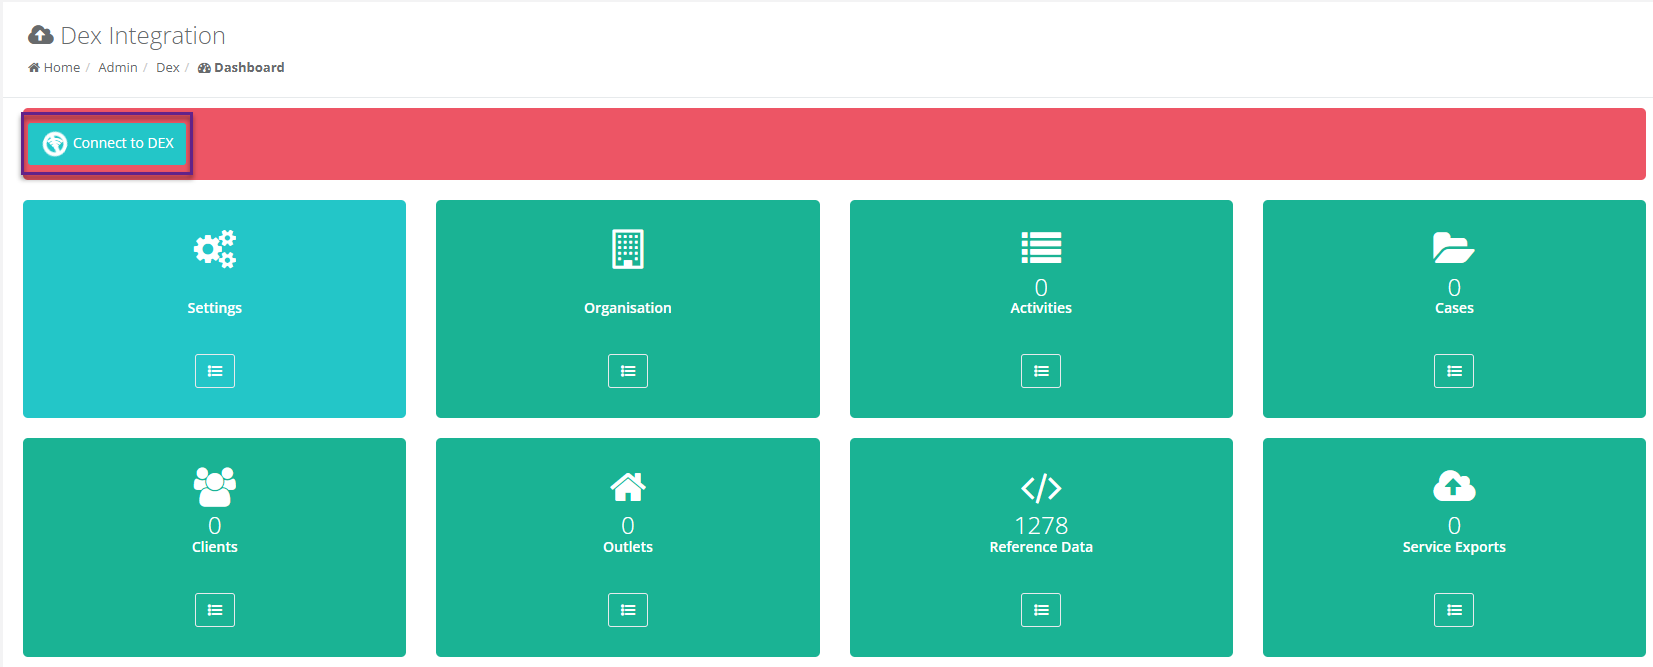
On the Dashboard, click the Connect to DEX button
2.
Click the Edit Credential button.
3.
Enter the DEX system account username and password then save.
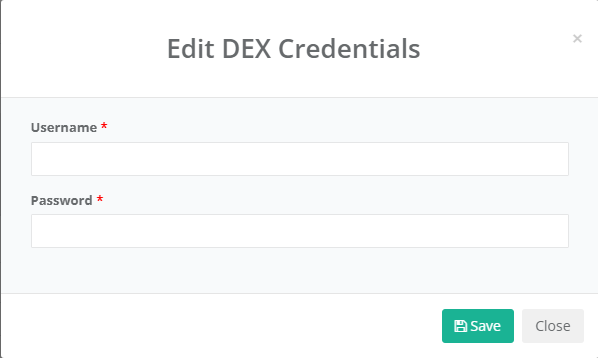
This process will only need to be completed once.
4.
Click the Test Connection Button.
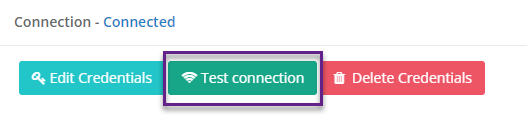
Ensure that the test results show "successful connection."
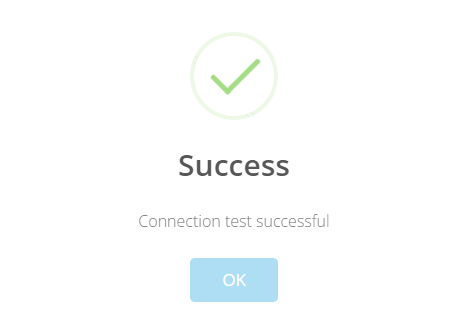
Press Ok.
5.
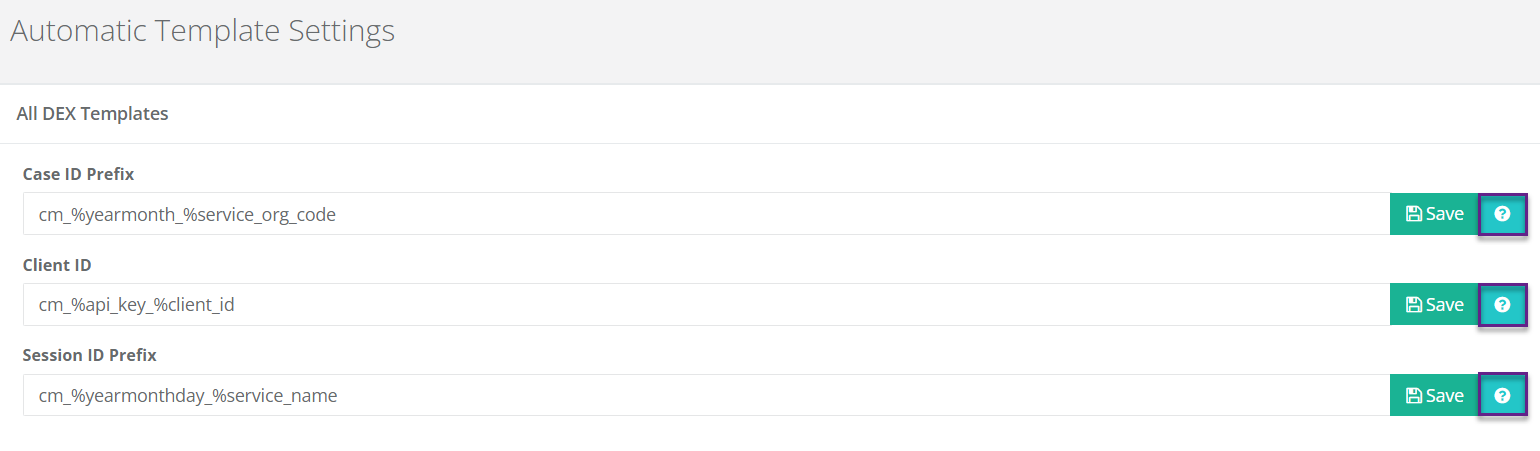
Review the Automatic Template Settings to verify that your Client ID, Case ID, and Session ID prefixes adhere to the specified format.
For each specific template, consult the accompanying help file located near the save button for additional options related to template fill points.
Please Note: The prefix CM, located at the beginning of the template is required to identify the CareMaster upload.
Step 3: Sync data with CareMaster
The process below outlines how to sync the data from DEX with CareMaster.
1.
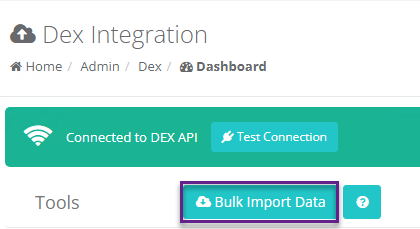
In CareMaster go to menu: Admin→ Integrations→ DEX→ Dashboard
Click the Bulk Import Data button.
On the pop-up screen, press yes to confirm. This will import the organisation data into CareMaster, including the Outlets, Activities the organisation is approved for and Reference data.
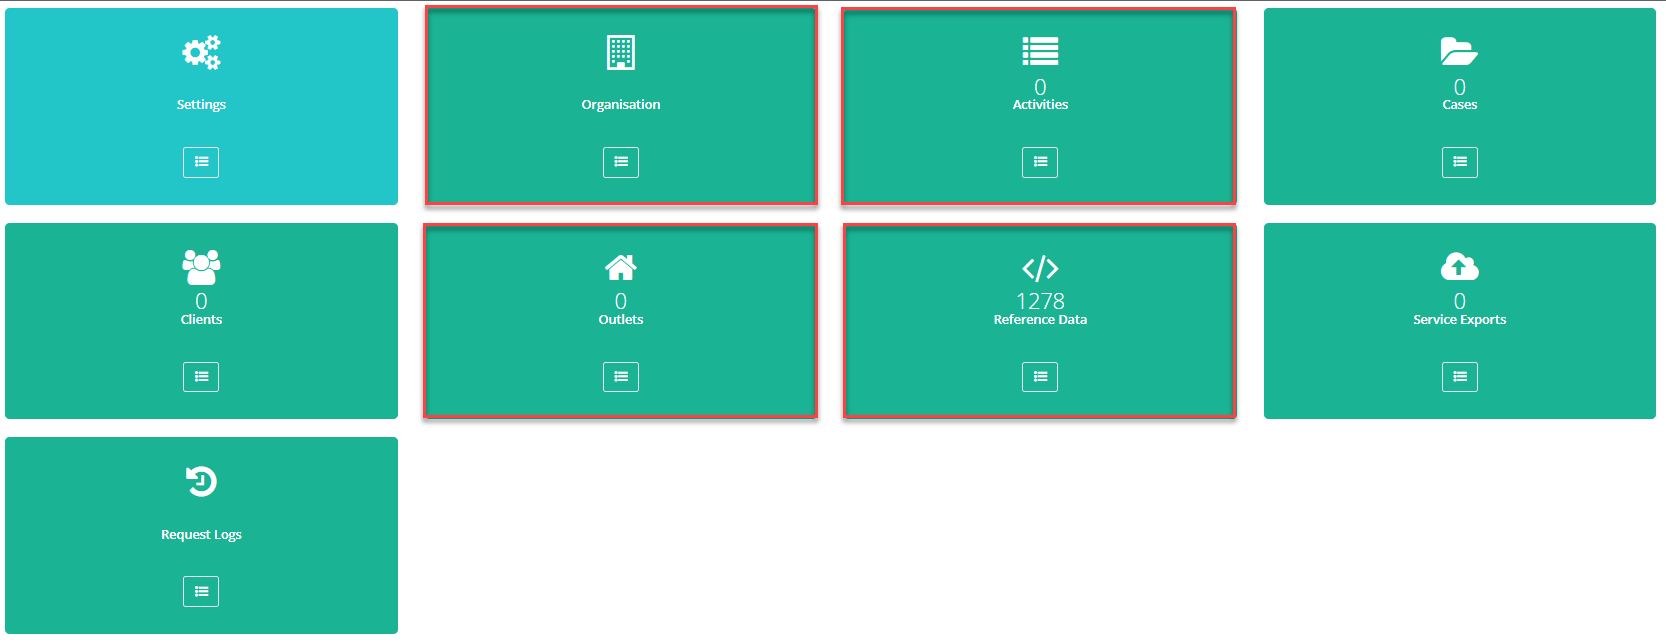
Please note: this will can take a while, CareMaster will advise when the process has been completed.
The items will be refreshed on the Dashboard.
Step 4: Activities
1.
Go to menu: Admin→ Integrations→ DEX→ Dashboard→ Activities
Press the Sync From Dex Button

Synchronising activities from DEX will provide you with a basic list of activities relevant to your organisation, including the activity name, start and end dates.
To access additional information about the activities, such as the applicable service and assessment types, please sync the activities from this page.
Step 5: Link DEX client records with CareMaster client profiles.
1.
You now need to import all your DEX client records into CareMaster from the DSS portal.
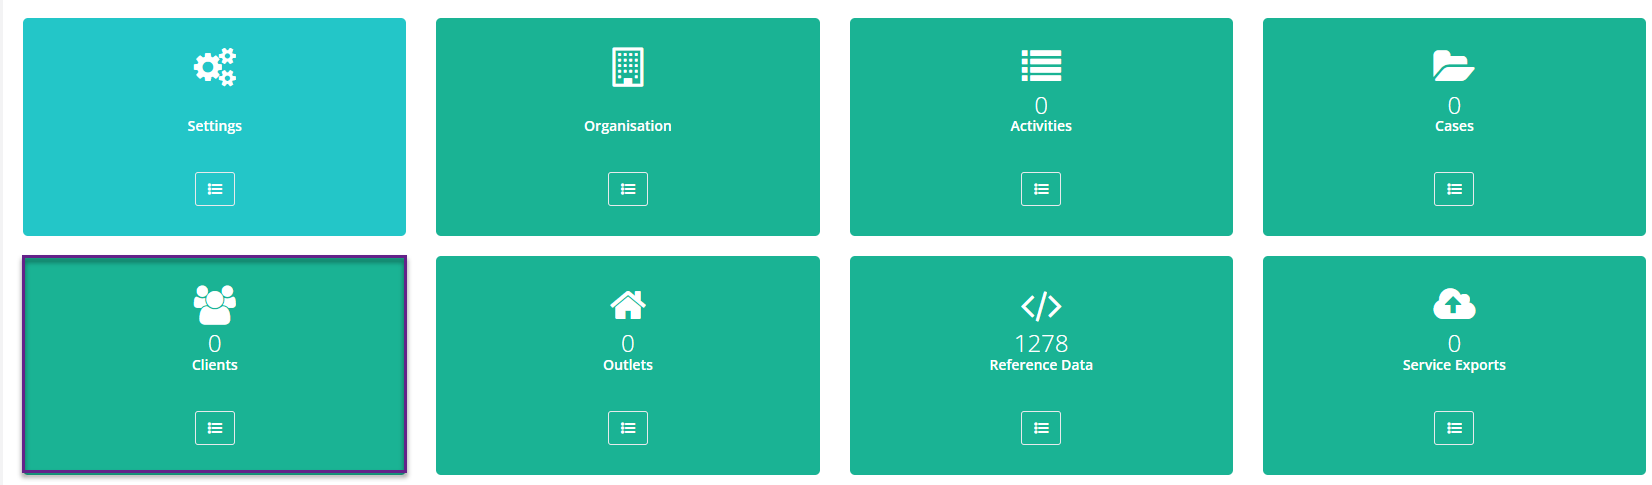
Go to menu: Admin→ Integrations→ DEX→ Dashboard→ Clients
2.
Click on the Import All button.

Please note: If your organisation has a lot of clients, it can take some time for the process to be completed. CareMaster displays a progress bar located at the top of the page to keep you informed about the import.

3.
After all the clients have been imported into CareMaster.
Click the Link Participants button.

4.
The screen will display all the active CHSP clients in CareMaster and recommend a corresponding DEX client record for association. The suggested names linked are determined using the client's first name, last name, and date of birth.
Please note: If a CHSP client record does not show in this section, you need to make sure that their CareMaster profile status is set to Active, and they have CHSP setup in their Funding Information.
5.
If client’s name is not automatically suggested, select the DEX Client Selection field next to their name to manually establish the connection between the profiles.
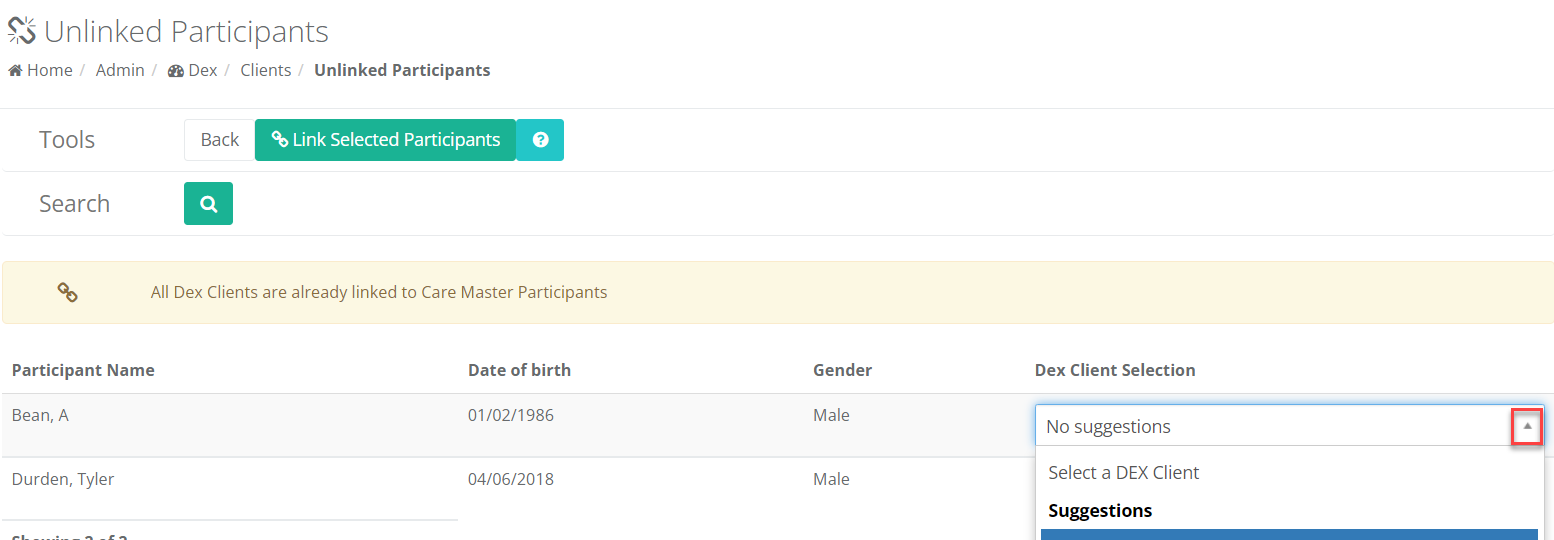
Leave the field blank if there are no suggested names available to select from.
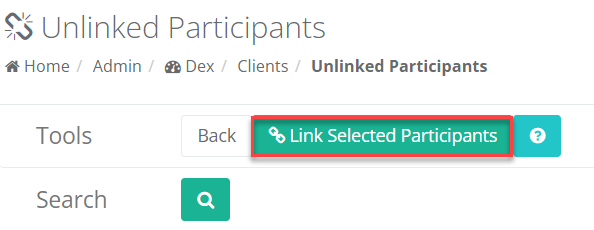
6.
Press the Link Selected Participants button, it will link the client’s profiles and remove their names from the list.
7.
To generate a DEX record for clients who haven't been configured on the DEX portal, navigate to the menu.
Admin→ Integrations→ DEX→ Dashboard→ Clients
Click the Bulk Upload button.

8.
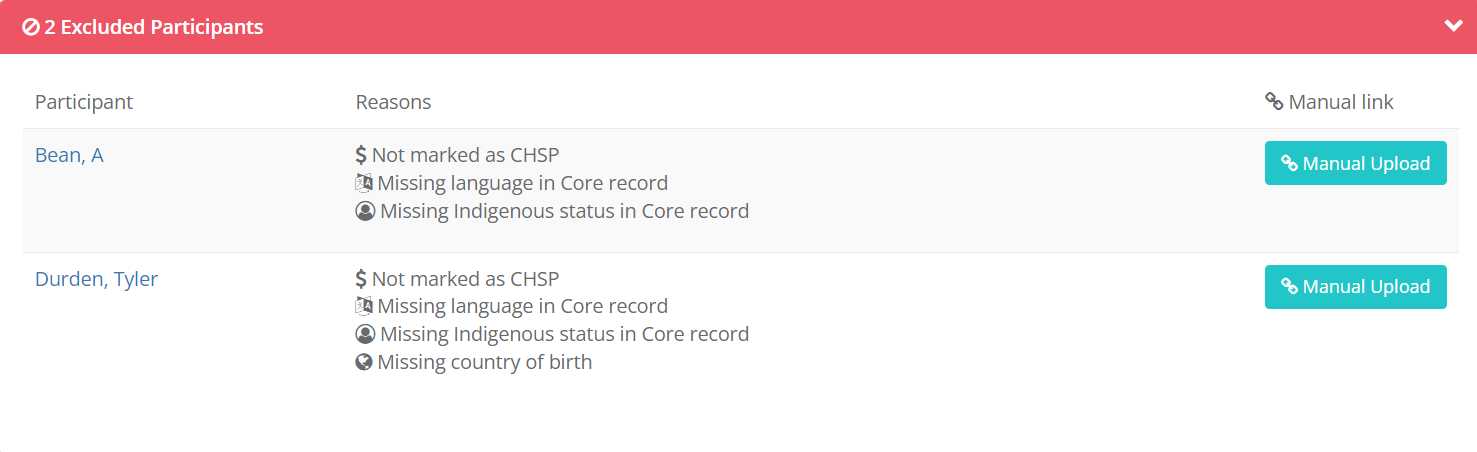
The list will show all clients for that have not been linked .
Navigate to the bottom of the page, where you'll find a red row displaying the excluded participants.
Click on this row to reveal the records and the explanations for why they won't be generated. You can then make necessary adjustments before proceeding with a bulk upload.
Within this guide refer to Additional Resources: Setup a new CHSP Participant’s CIARR/ Care Plan for addition information for setting up a participant’s profile.
9.
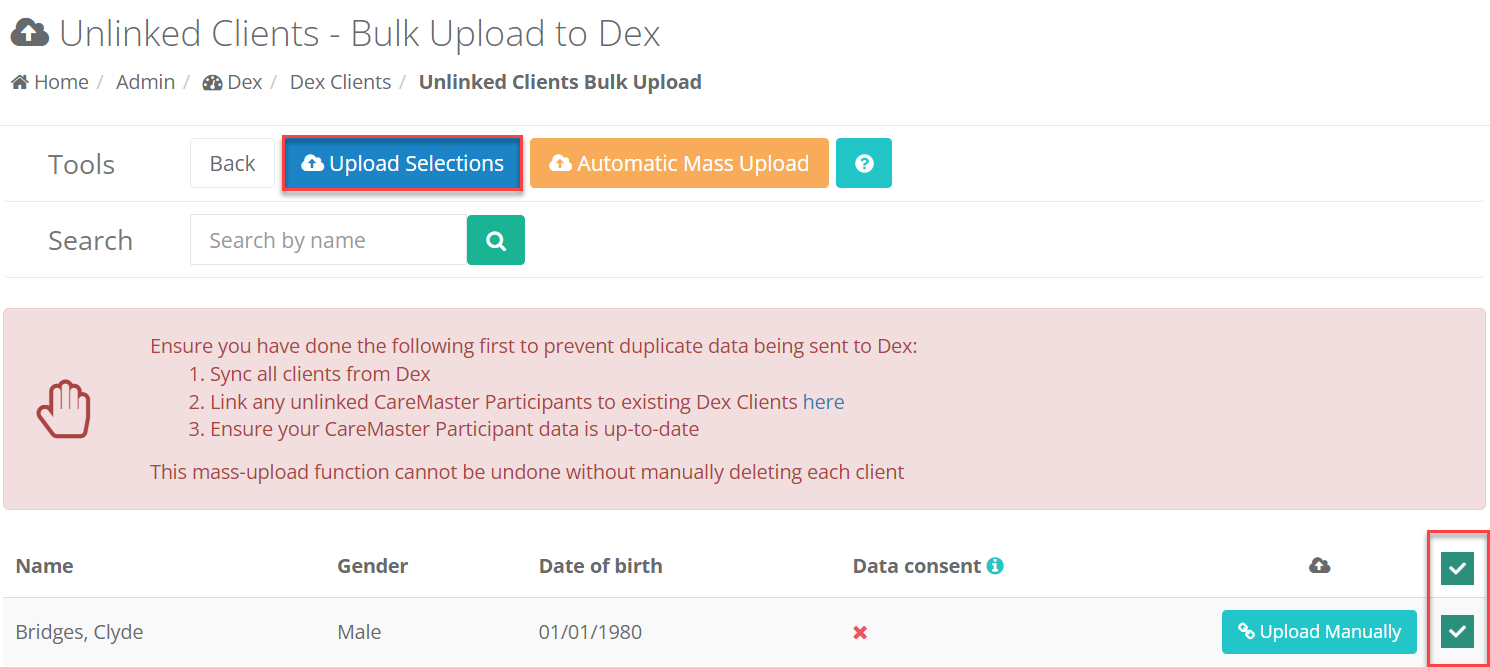
After you've completed the necessary updates to all the profiles and are prepared to initiate the record creation process in the DEX portal.
Tick the box in the column beside the clients you intend to transmit. Ticking the box in the header row will apply this action to all eligible clients in the list.
Press the Upload Selections button
10.
If there are multiple records, CareMaster will queue them and notify you once the task has been finished.
Step 6: Cases
Before syncing the case ensure your clients have been synced. For additional information
refer to Step 5: Link DEX client records with CareMaster client profiles.
A case serves as the initial stage in documenting service delivery details within the Data Exchange. It essentially mirrors the way supports are provided. Depending on the type of support, a case can be associated with an individual, a couple, a family, or a group of individuals.
A case captures:
- Where the service was or will be delivered .
- The program activity it is funded by.
- The client(s) receiving the support.
1.
Go to menu: Admin→ Integrations→ DEX→ Dashboard→ Cases
By selecting the DEX Case Search button, you can initiate a search within the DEX system for a specific case.

After receiving results from DEX, CareMaster automatically updates the corresponding cases.
2.
The initial basic import of case data would include all the IDs of the attached clients.
To initiate the basic case import, click the "Import All" button.

Due to the limitations of the Dex API, this basic import only retrieves a subset of the case data:
- Case ID
- Outlet activity ID
- Total number of unidentified clients
- Client attendance profile code
- End date
- Date the case was created
- Number of sessions attached
The basic case import does not include data about any attached clients or sessions. To retrieve this information, each case needs to be queried individually.
You can do this by viewing each case, or you can click the Deep Sync button.
Please note. This Deep Sync process looks at each case individually. If there are many cases, it could take some time. The requests will run in the background, and you'll get a notification once everything is synchronised.

3.
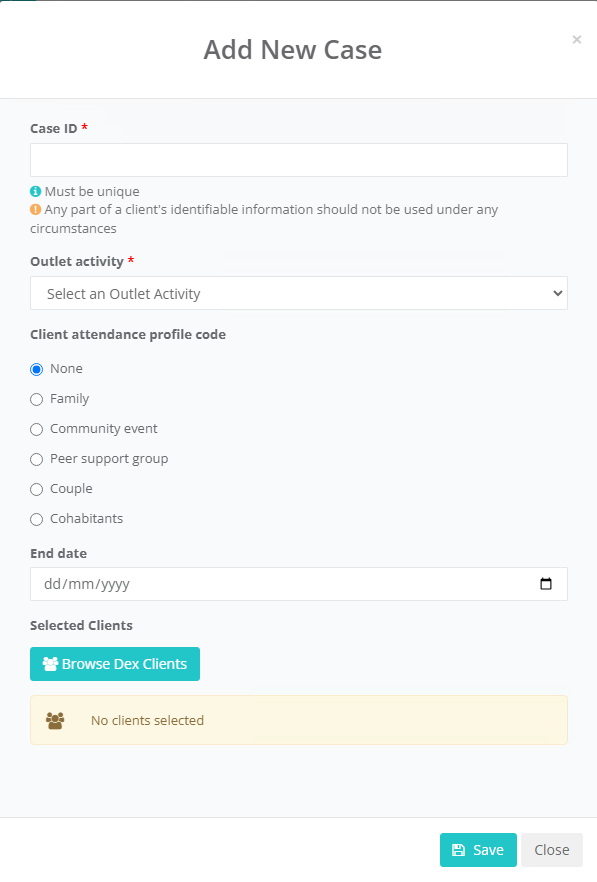
If you are required to add new cases, click on the Add New Case button

4.
Enter a unique Case ID. This will be the Case ID which will appear in DEX.
Please note: Do not enter any part of the participants identifiable information in the Case ID field.
5.
Select the required Outlet Activity from the dropdown menu.
6.
Select the required Client attendance profile code and enter the end date for the Case
7.
Click the "Browse DEX Client" button and use the "Valid for selected activity" filter. This will show you a list of DEX participants who meet the necessary requirements for the specific activity.
Choose the participants you need and then click the "Apply Selections" button.
8.
If the group has unidentified participants, enter the total number in the Unidentified Participants field.
For more information regarding Unidentified Participants, within this guided refer to Additional Resources: Setting up Non-Participant (DEX Unidentified Client)
9.
Press Save.
Step 7: Connecting the CareMaster CHSP Service Organisation with the DEX Outlets and Outlet Activities.
The process below outlines how to link the CareMaster Service Organisations to a selected Outlet and Outlet Activities.
1.
Navigate to the menu: Admin→ Service Organisations
Repeat the process below for each CHSP Service Organisation in your CareMaster database.
Select the Service Organisation containing the CHSP Service items.
2.
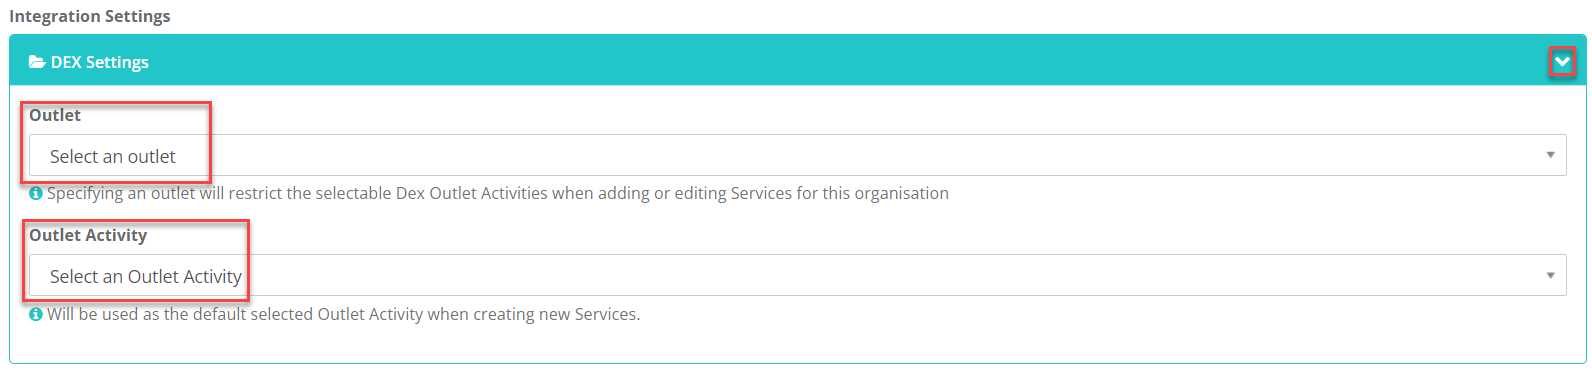
Scroll down the screen to the integration settings, click on the drop-down arrow on the left-hand side of the DEX Settings.
Assign the required DEX Outlet and Outlet Activity. The selected items will be used as the default Outlet Activity for the services items with in the CHSP service organisation.
Please Note:
Specifying an outlet will restrict the selectable DEX Outlet Activities when adding or editing service items for the organisation
Press the save button
3.
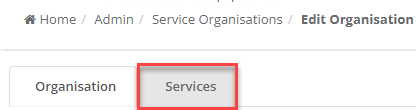
To link the DEX Outlet Activities with specific service items, scroll up and select the Service Tab. To view the list of service items in the CHSP service organisation.
4.
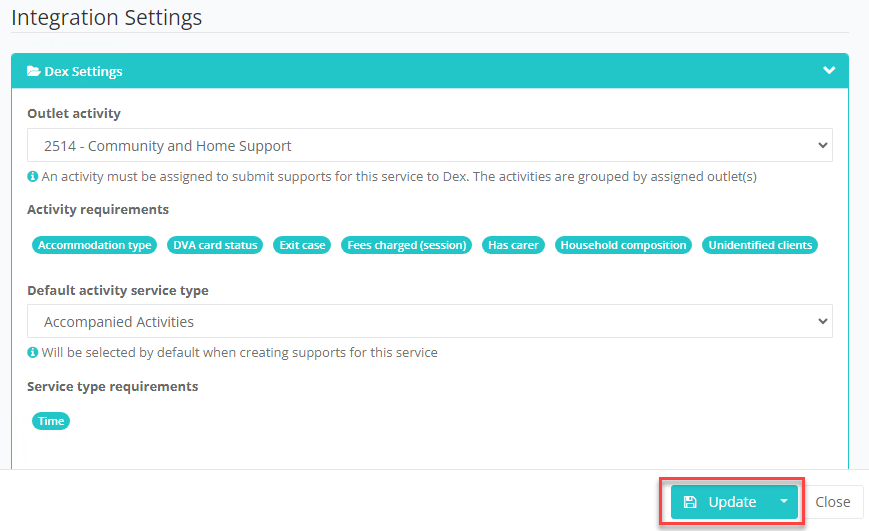
Click the Edit button next to the service item. On the pop-up screen scroll down to the DEX settings.
Click on the Default Activity Service Type field and select the Default activity.
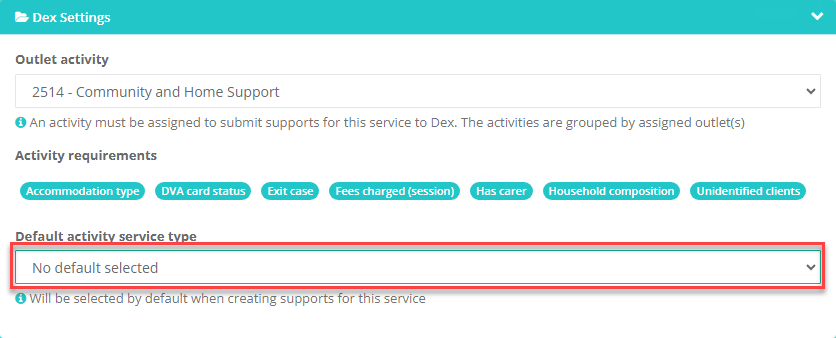
This default activity will be set as the primary option for support.
5.
Press Update. (repeat the process for each CHSP service item)
Step 8: Supports
For additional information regarding how to schedule Supports in CareMaster refer to:
1.
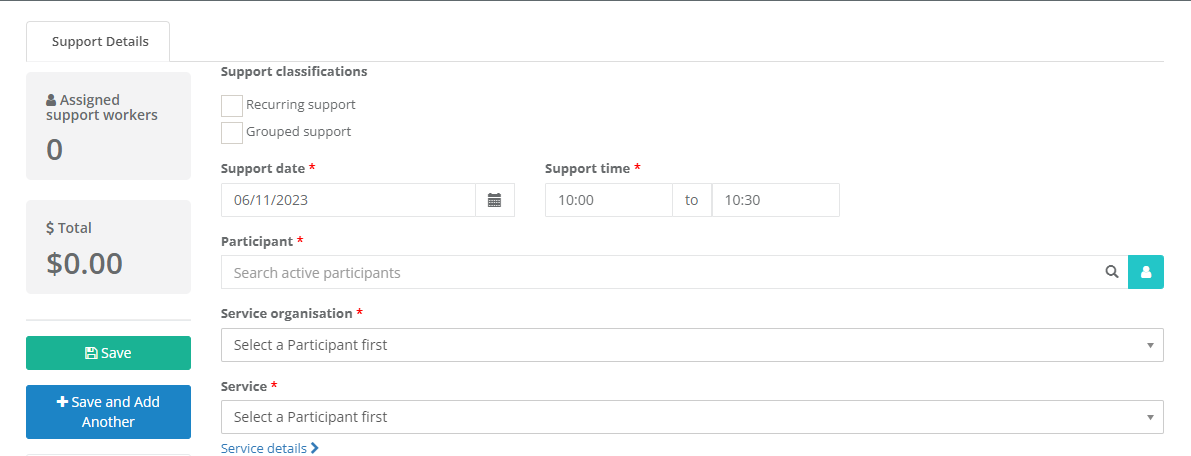
Using your preferred method, open a new support screen.
2.
Enter a Support Date and Support Time.
3.
In the Participant field, begin typing the name and select the participant from the drop-down list.
4.
Select the required CHSP Service Organisation and Service Item.
5.
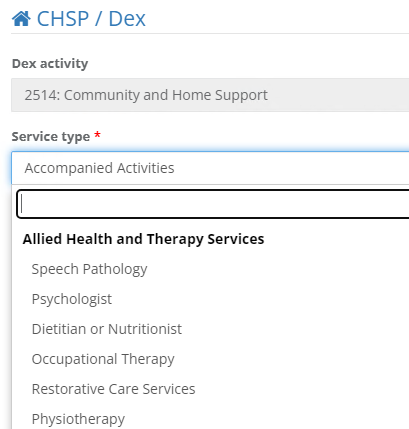
In CareMaster, when the CHSP Service Organisation and Service Item has been selected, the CHSP/Dex section will appear on the support screen. Within this section, you will be prompted to specify the service type.
If you have configured the Default Activity Service Type for the service item, it will be displayed automatically. (Refer to Step 5 for additional information)
Alternatively, you have the option to choose a service type, from the available outlet activities.
6.
Optional - Assign the worker(s) to the support.
The assigned worker(s) will be able to see this support in the Worker App.
7.
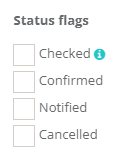
Status Flags – Selecting Checked will indicate that the support has been completed and is ready for the DEX Service Export, Invoicing and/or Payroll processes.
8.
Press the Save Support button.
Step 9: Identifying Supports Ready for Claiming
1.
Navigate to the menu: Supports→ All
2.
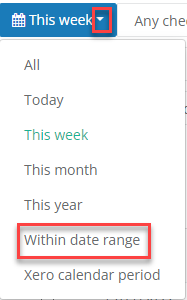
Click in the blue box and select Within Date Range. Enter the Start and End date of the reporting period. Use the additional filters to view the supports for the CHSP participants.
Press the search button.
3.
Review the Unchecked Supports. If an Unchecked Support needs to be included in the reporting period, mark the support's checkbox to include it.

4.
After the participants supports are all marked as Checked, they are ready to be included in the DEX reporting period.
Step 10: Service Export
1.
Navigate to the menu: Admin→ Integrations→ DEX→ Dashboard→ Service Exports
2.
Enter the DEX reporting date and the required filters.
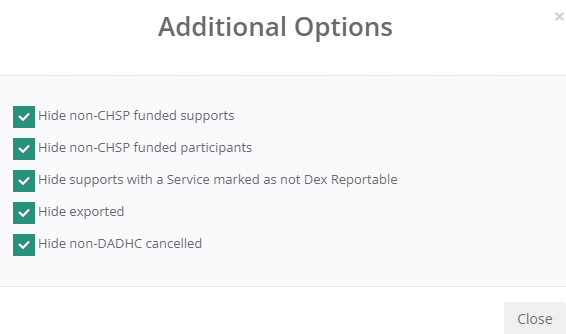
If you wish to send specific service organisations in your export, you have the option to filter by a service organisation. However, we advise keeping it set to "Any Service Organisation" to ensure that all CHSP-funded services are included in the export. By default, non-CHSP funded supports and previously exported supports are hidden from the list.
Click on the Additional Options button to narrow down your search.

Press the preview button to view the supports for the allocated date range.

The preview will display the totals of all the Included and Excluded Supports. The Included supports display the quantities and fees that will be sent to DEX.
3.
Click on the drop down to review a summary of the support totals

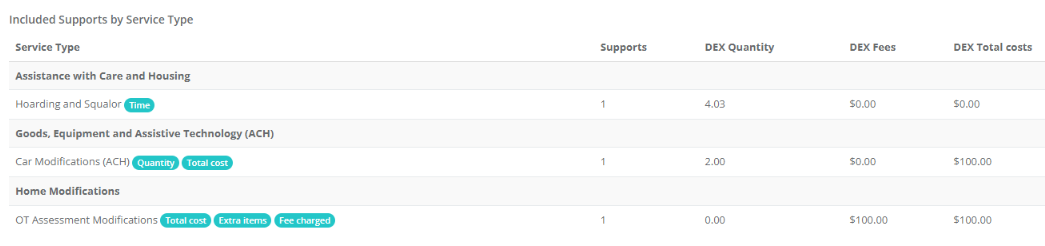
The preview screen also displays which participants have been included and excluded from the DEX Service Export.
If the participant has 0 Eligible Supports, then you can safely skip them as they do not have any supports during the DEX reporting period.
The Included Participants displays each participant that will be included in the export along with an overview of their Included Support Quantity, Included Fees Subtotal, Included Supports (the count of supports included / excluded for each participant).

To access additional information about each client, simply click on the + icon adjacent to their summary row within the Included Participants section.

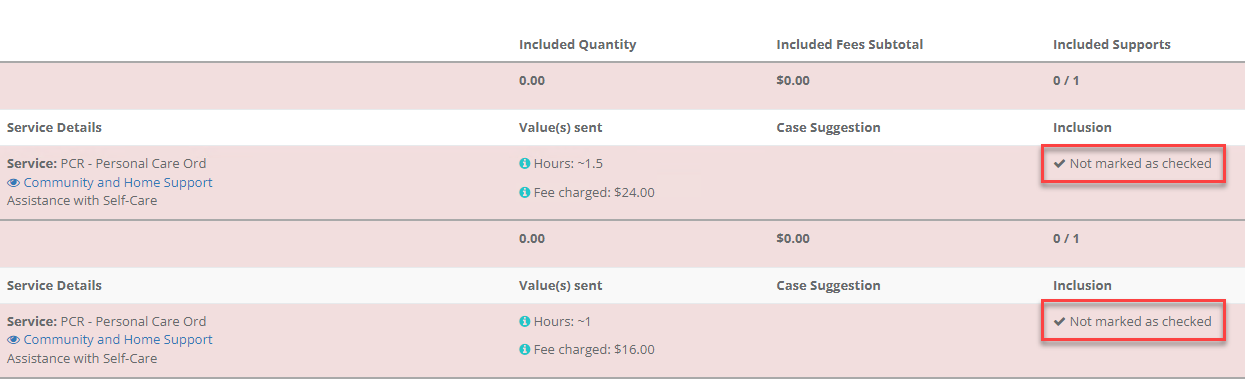
If the participant has excluded supports, click on the + button to expand the details. The reason why the support has been excluded is displayed under the Inclusion heading. Make the required changes to the support if it needs to be included in the export.
4.
After reviewing the excluded supports and made the required changes. Click the Refresh Preview button to update the Included Participants section.

5.
After making all the required changes. Press the Begin Export button to commence the DEX Service Export .

Please note: depending on how much data is in the export it may take some time to complete. When the export has been completed or an error has occurred CareMaster will display a notification.
You can now navigate away from the page and leave it to process in the background.
6.
CareMaster will display a notification if there are any issues with the export.
If an error has occurred, the user that started the export will be notified:
- Refer to Admin→ Integrations→DEX→ Request Logs for additional information
- Return to menu: Admin→ Integrations→ DEX→ Dashboard→ Service Exports
- Resolve the issue/s.
- Press the Run Again button to restart the Export.
7.
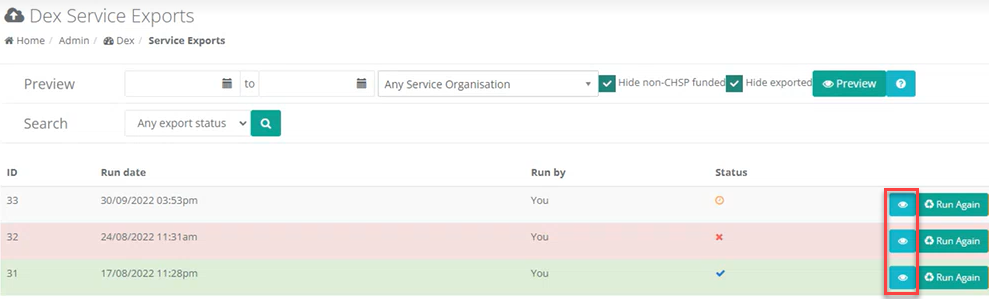
Navigate to the menu: Admin→ Integrations→ DEX→ Dashboard→ Service Exports
Whilst the report is waiting to be finalised an orange clock icon will be displayed under the Status. When the export has been completed, it will show as a blue tick within a green row.
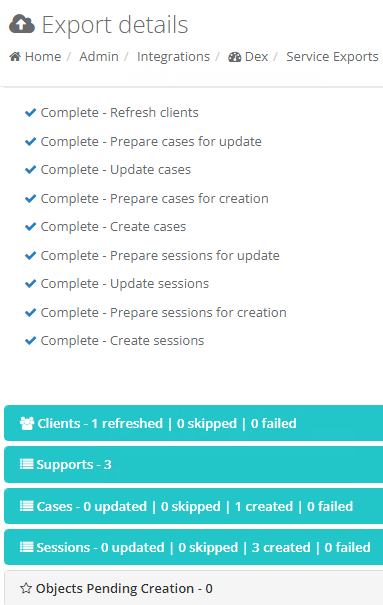
Click on the eye button to view the report’s export details
Additional Resources: Setup a new CHSP Participant’s CIARR/ Care Plan
The process below outlines the required fields that need to be completed on the participants CIARR/ Care Plan Tab. This information is necessary for storing data related to Aged Care, CHSP, and DEX.
For more details on how to create a participant's profile, please refer to:
User Guide: The Participant Profile
1.
Open the Participants Profile
2.
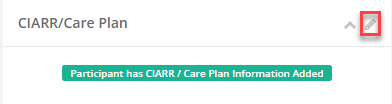
Go to the Participants CIARR/ Care Plan Tab and press the edit button.
3.
Click on the Information Tab.
Enter the information in the following fields:
- Country of Birth
- Indigenous Status
- Language Spoken at Home
Click on the CHSP Tab
Enter the information in the following fields:
- Household composition
- Mains source of income
- Income frequency
Please Note: The above fields will default to ‘Not Stated’ to enable the uploading of participants' transactions to DEX if you do not have this information available.
4.
Scroll down the screen and press the Save button
Additional Resources: Setting up Non-Participant
(DEX Unidentified Client)
CareMaster requires the creation of a participant profile to facilitate the DEX upload. This process outlines how to create a non-participant profile in CareMaster, for the purpose of submitting group transactions to DEX when the participants details are unknown.
Non-participant profiles serve various purposes, such as assigning supports for tracking, reporting, or other administrative needs, without associating them with a current/actual participant.
Depending on the specific user profile and access levels, any user can view and interact with a non-participant record as if it were a current participant. However, only administrators have the authority to create new records, create new profiles, and modify existing profiles.
Regardless of the profile settings assigned to a non-participant record, certain exclusions apply:
- Non-participants are not included when emailing rosters to participants.
- Non-participants bypass specific validations when a support is saved to their profile, including space types for workers and vehicles, and worker incompatibility.
- Non-participants are not considered when generating NDIS exports.
1.
Navigate to menu: Data→ Participant Data→ Non Participant Profiles
2.
Click on the Add Profile button
3.
Enter the Profile Name, Descriptions and Select the required Profile Options.
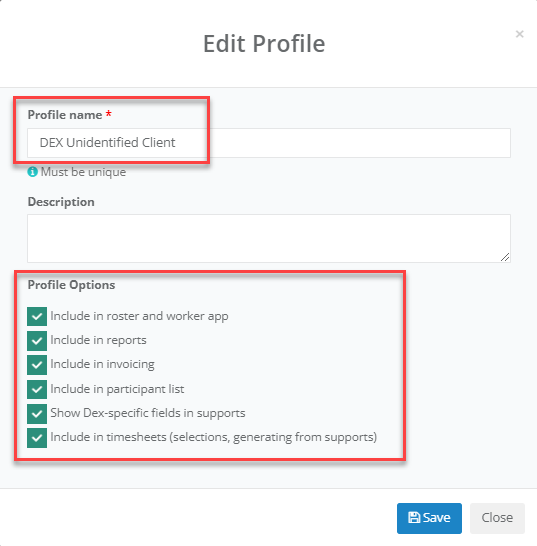
Press Save.
4.
If the profile option Include in Participant list was selected.
Navigate to menu: Participants→ List
5.
Click on the Non Participant Button

6.
Press the Add Record button

7.
Select the required non participant profile from the list
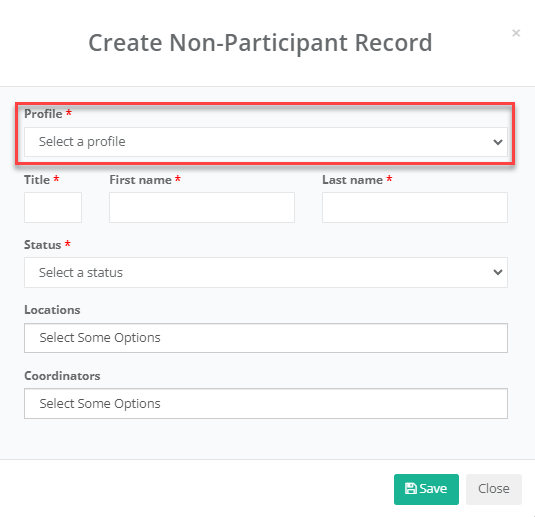
8.
Enter the Title, Fist Name and Last Name.
Set the Status to Current.
The Location and Coordinator Fields are optional.
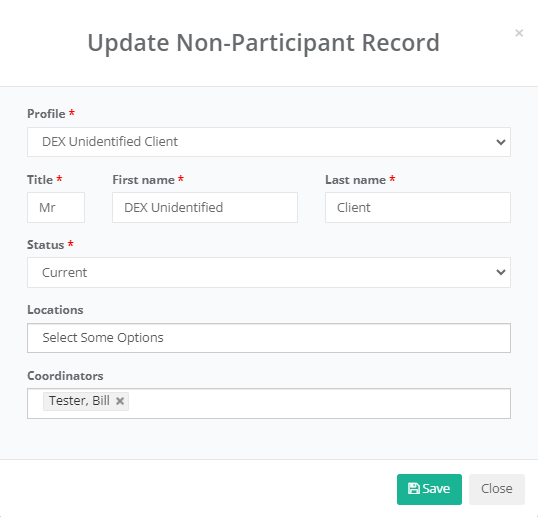
Press Save.
9.
The DEX Unidentified Client will be available to search for in the Participant List.
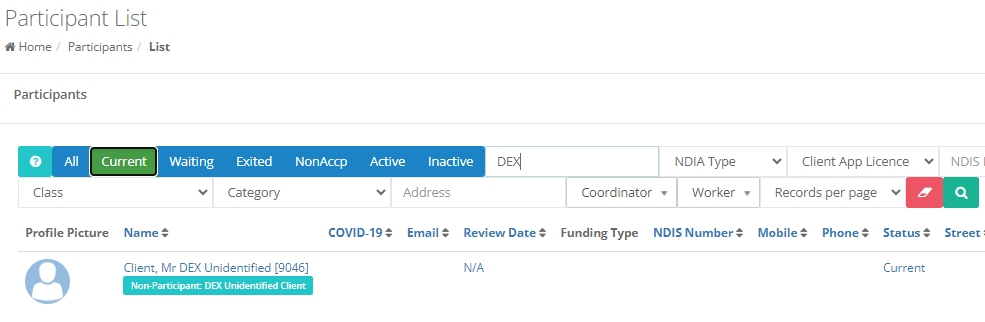
Additional Resources: Creating a New CHSP Service Item
1.
If your organisation requires an additional service item to be added to the CHSP service organisation/s navigate to the menu: Admin→ Service Organisations
2.
Click the edit button next to the required CHSP Service Organisations.
3.
Click on the Services Tab and press the Create New Service Button.

4.
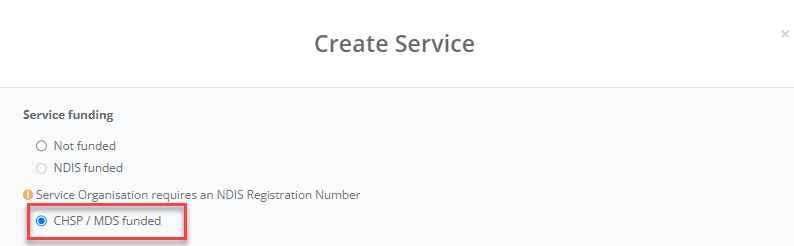
Select the CHSP/MDS Funded option
5.
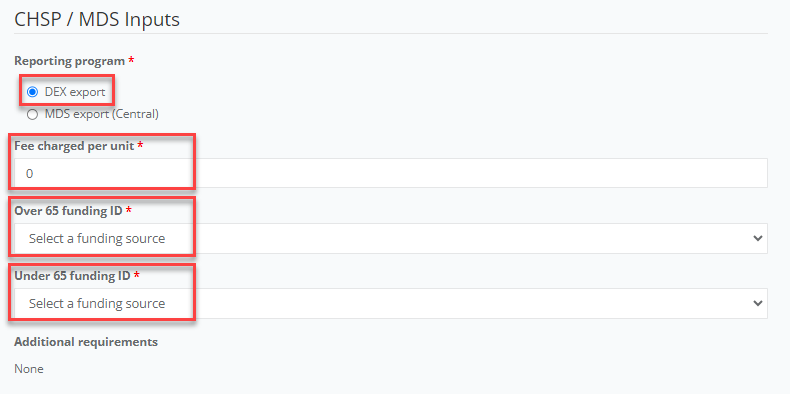
For the Reporting program select DEX Export.
Enter the Fees charged per unit - The Fee Charged field contains the additional costs the organisation charges the participant for the service.
The field can have a default value that automatically populates when the transaction is generated. If you choose to leave the value as 0, you can manually input the fee when creating a support/transaction. When manually entering fees for a support, please enter them in the "Supports Other Cost" field.
If the client has Service Items with different options for participants, such as "Fee Charged" and "No Fee Charged," it is recommended to create a new Service Item. In the "Service Name" field, reference "No Fee Charged" and assign a value of $0 in the "Fee Charged" field
Select the required Over 65 funding ID and Under 65 funding ID
6.
Enter the Service name.
7.
Enter the Services Status Code e.g. ACH, ACC, SSP
8.
Enter the Unit Cost.
Please note: This is the amount DSS pays the organisation.
9.
Select the required GST code.
10.
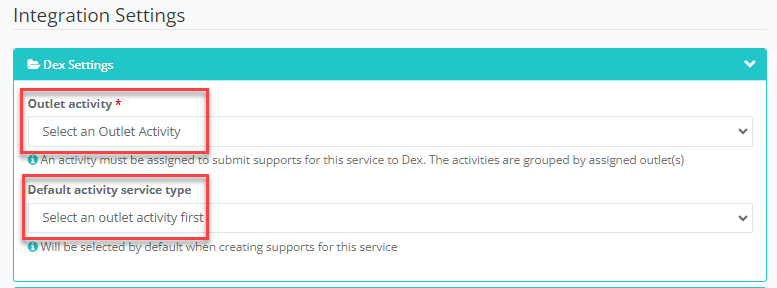
Scroll down to the Integration Settings and click on the drop-down arrow on the left-hand side of the DEX Settings.
Select the required Outlet Activity and the Default activity service type.
11.
Press the Create button to save the service item.
Support outside activity date error message
When processing your DEX Export you may receive the following message “Support outside activity date”
You will need to update the end date via the Menu options Admin > Integrations > DEX > Activities.
Select Sync from DEX
Then go to Admin > Integrations > DEX > Outlets
Select Sync Outlet>>Activity Links
Invoicing Participant Fees Charged
Your participant Fees Charged can be invoiced to them. To do this you will need to generate a report to identify the amount.
Go to Reporting > Account > Participant Invoices - Fees Charged